Blurb
An ADDRESS BOOK and PLANNER on cassette for the Acorn Electron
This pack consists of two programs on cassette plus an instruction booklet for Desk Diary on the Acorn Electron. At home it's a personal secretary, or in the office it will serve as a central filing system which can cope with all office appointments, keep track of all contract telephone numbers and addresses, and file customer records or mailing lists of several hundred names.
The ADDRESS BOOK allows you to build up a file of several hundred names, addresses, and telephone numbers which can be retrieved by name, or by matching with other information specified in the entry. All or selected names can be printed.
The PLANNER works just like a written diary but with a real-time alarm and many automatic features. There is space for 300 entries, which may be of three kinds: appointments at a specified time of day; regular events such as birthdays and bill payments which automatically get carried forward; and exclusive entries, for trips and holidays, which prevent appointments from being made over a specified period.
Options are selected from menus with single key entries, or you are prompted for information - Desk Diary can be used by almost anyone, providing really foolproof efficiency at home or in the office."
Introduction
Desk Diary can handle all your office appointments, keep a record of dates and times you should remember and record all your names, addresses and telephone numbers.
This guide describes the two programs that make up Desk Diary:
ADDRESS BOOK, which can hold a file of several hundred names and addresses;
PLANNER, which has space for up to 300 entries and contains a clock and an automatic alarm.
To leave either ADDRESS BOOK or PLANNER, press BREAK.
Address Book
ADDRESS BOOK can be used in exactly the same way as an ordinary Address Book to record the names, addresses and telephone numbers of a list of people. It can hold a file of several hundred entries which you can display, print out or sort into smaller lists.
ADDRESS BOOK can also store extra information about the people listed, such as what a company does, or who a person is; a plumber, or an electrician, for example.
You can search through all the entries and select those which contain one element - it could be all the names starting with a certain letter, or all the entries with specific extra information. These entries can be displayed or printed out as a separate list.
Any list you ask for is displyed or printed out in alphabetical order, according to the first letters entered in the name box. If you want the names to be in alphabetical order according to surname, type in the surname first, followed by first names or initials.
Running Address Book
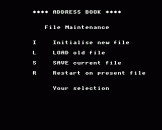
Load the program and you will go straight to the File Maintenance display.

When you run ADDRESS BOOK for the first time you have to tell the program that you are going to start a new file to hold the information you are going to type in. This is called 'initialising' a file and the program will not be able to run until you have done this.
After the first time, you can either initialise a file (if, for instance, you want to start a totally separate address list) or you can load an old one which you have previously saved.
Type in one of the following letters, followed by RETURN.
| I ... | to initialise a file (always select this the first time). |
| L ... | to load a file that you have previously set up and saved. Make sure that you have the right cassette in the recorder and that the counter is set to just before where the recording starts. |
| S ... | to save the file you are working on. Be sure to save on a cassette other than the program cassette, and to make a note of the counter number at which it starts. Press RECORD and RETURN when the program tells you to. |
| R ... | to start working again on a file which is in the computer's memory. (If you revert to BASIC, by pressing BREAK for example, type OLD before typing R to return to a current file.) |
The option you choose will be highlighted on the screen, the letter you type will appear beside the "Your selection" prompt and ADDRESS BOOK will display a message, telling you what it has done.
Press RETURN again to continue and the main menu will appear.
Entering Your Address Details
**** ADDRESS BOOK ****

N New entry

A Amend entry

D Delete entry

F Find entry - NAME key

R Retrieve on special key

P Print/display all entries

M Maintain file

 Your selection
Type in the letter next to the option you want (see the following explanations) and press RETURN.
N New entry
When you first start using your ADDRESS BOOK program, it will be empty, so type in all the addresses and information that you want to work with, by choosing N.
  NEW ENTRY

NAME  CUTHBERT D J

ADDRESS 14 BROAD STREET
   HOLBORN
   LONDON

POSTCODE WC1N 2PH

TELEPHONE 01 405 1223

EXTRA INFO WC1N

 Name CUTHBERT D J added
Type in the name, address, postcode and telephone number and press RETURN at the end of each entry. The spaces on the screen show you how much room you have. Remember to type in the surname first if you want the list to be in alphabetical order according to surname.
Press DELETE to erase any mistakes on the line you're currently entering. (If you notice a mistake in a line above the one you are in, you will have to change it using "Amend entry" - see below.)
You can press RETURN if you want to leave the box empty.
Use the extra information box to note any details about the entry, or to list customer codes. You will be able to use this information to extract and list entries.
When you have finished an entry, the information will be added to the list. Press RETURN to make another entry.
When all your names and addresses have been entered, you can go back to the main menu by pressing RETURN twice.
A Amend entry
Choose this option to change information you have typed in. Find the entry you want to change by typing the first few letters of the name. The program then displays the whole entry.
Make the changes by pressing RETURN to move the cursor (the flashing line) to the box which contains the mistake. Then retype the whole line and press RETURN. The rest of the entry will stay the same.
Note: You cannot change the name in this way. To do this, you must type in a whole new entry with the correct name, and delete the old entry, using "Delete entry" (see below).
D Delete entry
To take out an entry which is no longer needed, select D. Find the entry by typing in the first few letters of the name. When it is displayed, ADDRESS BOOK will ask you:
OK TO DELETE (Y/N) ?
If you type Y the entry will be erased and the program will tell you it has deleted it.
If you type N the entry will be removed from the screen and you can type in the first few letters of another entry, or press RETURN to go back to the main menu.
F Find entry - NAME key
If you want to look at an entry, type in the first few letters of the name and press RETURN and ADDRESS BOOK will display it for you. Press the Space Bar or RETURN to look at another entry, or press RETURN twice to return to the main menu.
R Retrieve on special key
Use this option to extract from the ADDRESS BOOK all the entries that have a certain item in their extra information box. First, type in the information for which you want the program to search. Then enter which boxes of the relevant entries you want displayed or printed, by typing one or more of the following letters and pressing RETURN.
| N ... | for the name |
| A ... | for the address |
| P ... | for the postcode |
| T ... | for the telephone number |
| E ... | for the extra information |
You will then be asked if you want the output to go to the printer. If you type N the list will be displayed on the screen. If you type Y you will see:
Number of lines to be left between labels:
This is in case you are asking for a print-out to address labels for something like a circular letter or a mailshot. If this applies to you, measure the distance between labels and enter the appropriate number of lines.
If you just want a list, enter 2 for double spacing.
Press RETURN to return to the main menu after the display or printout.
P Print/display all entries
If you want to print out or display a list of entries in ADDRESS BOOK, select P. You will then be asked to enter a starting name. The final print-out or display will list the contents of the ADDRESS BOOK from the starting name through to the end of the ADDRESS BOOK file. If you press RETURN instead of typing a starting name, then all the entries will be listed or printed out.
Next, enter the letters corresponding to which lines of information you want. If you press RETURN, just the name, address and postcode will be displayed or printed.
M Maintain file
Choose this to return to the "File Maintenance" menu.
Remember to save your file after you have been making any entries or amendments to ADDRESS BOOK.
Planner
PLANNER is much more than just a computerised desk diary. It also:
- keeps a record of clock time - make sure to set it accurately so that you keep your appointments on time
- gives you instant calendar details for any month you specify
- sounds an alarm to remind you of appointments
- prevents you from making appointments for times when you won't be available
- reminds you about important days (such as birthdays) or things that happen regularly (such as payment of certain bills).
Type in your appointments, your reminders and your holidays. Then, if you look at PLANNER regularly, you can make sure that you never miss an appointment or an important event; you can plan ahead effectively and you can see, at a glance, what is happening tomorrow or next month.
You can enter and delete appointments, set up reminders for yourself, check what is coming, and make sure that you don't arrange to see someone when you will be away on holiday!
Running Planner
Load the program and you will be presented automatically with the first PLANNER display:
Enter the date :

Day  :
This is where you enter the date and the time, so that the calendar and clock can run accurately.
Type in the number (not the name) of the day (for example, 23 not Monday), followed by RETURN. You will then see:
Month  :
Year 19 :
Enter either the number or the name of the month (for example, 1 or January) and the last two digits of the year (for example, 84), following each entry by RETURN.
When the date is displayed it will automatically show the name of the day and the month.
You can choose to enter the time in either the 12 or the 24-hour clock systems but, whichever you choose, PLANNER will display the times of your appointments in the 24-hour system. If you choose the 12-hour clock, you will have to tell the program whether it is am or pm.
You set the clock by typing in the time in hours and minutes, and whether it is am or pm, if relevant. Make sure that you set the time accurately, so that the alarm sounds for your appointments at the right time.
When you have entered all the necessary information, your screen will look something like this:
 **** PLANNER ****

Wednesday 14 March 1984


 Enter the date :

 Day : 14
 Month : MARCH
 Year 19 : 84

24 hour clock (Y/N) ]N

 Enter the time :
 Hours : 10
 Minutes : 50
 AM/PM : AM
Pressing RETURN after the final entry takes you to the next screen which is the "File Maintenance" menu.
File Maintenance
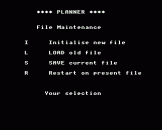
Next, tell the program that you are going to start (initialise) a new file to hold the information you are going to type in, so that the program can run. After the first time, you can either initialise another file (if, for instance, you want to start a totally separate diary for someone else) or you can load an old one which you have previously saved.

Type in one of the following letters, followed by RETURN.
| I ... | to initialise a new file (always select this the first time). |
| L ... | to load a file that you have previously set up and saved. Make sure that you have the right cassette in the recorder and that the counter is set to just before where the recording starts. |
| S ... | to save the file you are working on. Be sure to save on a cassette other than the program cassette, and to make a note of the counter number at which it starts. Press RECORD and RETURN when the program tells you to. |
| R ... | to start working again on a file which is in the computer's memory. (If you revert to BASIC, by pressing BREAK for example, type OLD and then RUN before typing R to return to a current file) |
The option you choose will be highlighted on the screen, the letter you type will appear beside the "Your selection" prompt and PLANNER will display a message, telling you what it has done.
Press RETURN again to continue and PLANNER's main menu will appear.
Wednesday 14 March 1984 :

10:51:16 am


D Day-to-day

P Plan ahead

C Coming soon


M Maintain file

Your selection
Type the letter next to the option you want (see the following explanations), and press RETURN.
D Day-to-day
Choose this option to enter or delete details of your appointments, reminders and times when you won't be available.
You can make entries for any day you want, by choosing to move forward or backward in your diary.
Type in the day you want, or press RETURN for today. You will see:
Enter action (I/D), or page (B/F)
If the screen is displaying the day you want, you will only need to choose between I for insert and D for delete (see below). If you want another day, first type F to go forward in your diary or B to go back before choosing between insert and delete.
If you type I to insert an entry, and press RETURN, you will see:
Appointment/Reminder/Unavailable :
Type the initial letter of one of the three options, followed by RETURN.
| A ... | for appointments (enter the time and type). |
| R ... | for reminders. You can have two kinds of reminder:
Type in the number of times you want the reminder to happen (you can have up to 25). If it is more than once, enter the number of days you want in between each reminer. If the program has to make several entries this will take a few seconds. |
| U ... | for times when you will be unavailable. You can enter why you won't be available or during which hours, for reference. Once you have made this entry, PLANNER will not allow any further appointments to be made on that day. |
Note: When you have the main menu on the screen, an alarm will sound at your appointment times. You can turn this off by pressing the Space Bar.
If you type D to delete an entry, and press RETURN, you will see:
Enter line no to be deleted :
Type in the number on the extreme left of the line which contains the information you want deleted and press RETURN.
P Plan ahead
Choose this option to look at the calendar of any month. Pressing RETURN gives you the month you're in and highlights the day you're in. The display will show any birthdays or special occasions in that month.
C Coming soon
If you want to find out what is in the diary ahead, you can ask PLANNER to display the entries for up to the next thirty days. This may take a few seconds and will end with a "That's all" message.
M Maintain file
Choose this to return to the "File Maintenance" menu.
Remember to save your diary entries or amendments when you have been working on PLANNER.


