

Shape up in full colour with
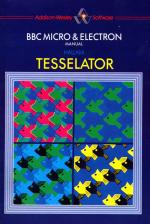
TESSELATOR
An interactive tesselation design program combining user-friendly programs with comprehensive and clear documentation in a package of colour and variety.
Tesselation, or the covering of a flat surface with shapes or tiles so that no gaps are left, is one of the most fascinating areas of geometric art. Many people have spent many hours trying to design shapes that will fit together as required.
Now, using Tesselator, you can enter this compelling field. The procedures included can be used to produce a wide range of tesselation patterns with stunning visual effects.
Two major types of tesselation are covered:
'Escher' patterns where single shapes of many different types fit together to cover the screen. All 17 possible tesselating groups based on squares are included, together with others based on triangles and hexagons.
'Penrose' patterns where by using the same two shapes every time, an infinite number of different patterns can be produced. You will be surprised at the range and variety produced solely from 'kites' and 'darts'.
Tesselator is not just a program that churns out the programmer's ideas for you to look at, but a set of tools for you to use your own ideas and imagination to produce infinitely varied, colourful and decorated tesselations.
With Tesselator you can generate your own unique and original designs for wall decorations, floor decorations, paintings, fabric patterns and patchwork layouts.
With Tesselator you can explore and experiment with the imaginative and intriguing aspects of geometry and mathematical transformations.
Contents
Introduction
Escher Tesselations
Triangle Mosaics
Patchwork Patterns
Penrose Tesselations
Escher Tesselations
Desiging A Shape
Saving A Shape
Decorating A Shape
Saving A Decoration
Pegasus: Another Shape to Try
Commands
Colour Layout Changes
Extending (Or Reducing) The Plotting Area
Saving a Screen Display
Grids
Square Tesselations
Square Rotations
Square Reflections
Tesselating Triangles
Tesselating Hexagons
Multiple Tile Sets
Starting Shapes and Tesselation Grids
SHAPER: Complete List of Commands
DECOR: Complete List of Commands
Triangle Mosaics
Designing a Shape
Tesselating a Shape
Colouring a Shape
Changing Colours
ESCAPE
Command Summary
Patchwork Patterns
Starting Up
Picking and Dragging a Shape
Fixing a Shape
Painting a Shape
Program Listing
Using Other Shapes
Command Summary
Penrose Tesselations
Periodic and Non-Periodic Tesselations
The Penrose Kite and Dart
Picking and Dragging Program
Creating a Pattern
Saving a Pattern
PENROS1 Command Summary
Automatic Expansion of Penrose Tesselations
PENROS2 Command Summary
Tesselation and Mathematics Teaching
Principles of Repeating Pattern Design
Further Illustration of the Principles
The Tesselator disc is 40 track, single sided, single density.
The programs in Tesselator are arranged on the tape as follows:
| Side A | Side B |
|---|---|
| SHAPER | DECOR |
| SQU2 - SQU17 | TRIANG |
| HEX1 - HEX3 | PATCHES |
| TRI1 - TRI3 | PENROS1 |
| SQUARES | PENROS2 |
| TRIANGS | |
| QUADS |
Acknowledgement
The authors are grateful to Professor Roger Penrose for his permission to reproduce programs based on the non-periodic tesselations devised by him and patented as Penrose Tesselations (British Patent 15448164, and US Patent 4133152).
Introduction
Shapes are said to tesselate when they can be used to cover a flat surface without leaving any gaps. The simplest tesselation can be seen in the tiling of a bathroom wall. Square tiles arranged in rows will cover the wall completely but circular tiles, no matter how they are arranged, will always have gaps between them. Squares, then, will tesselate, circules will not. Rectangles, hexagons and some triangles are other well-known tesselating shapes.
Many artists and designers have used tesselations in their work. Usually this has meant long hours of 'trial and error' as it is not always easy to see if even quite simple shapes will tesselate. Now, with the programs in Tesselator you can avoid all the donkey-word, and experiment freely with complex and natural patterns, gaining a deep insight into this fascinating area of geometric art.
Tesselator is divided into four sections, each of which concentrates on a particular aspect of the subject.
Escher Tesselations
The first, and largest, section is based on the type of tesselation made famous by the artist M. C. Escher. In his work he used a vast range of tesselating shapes that he invented himself. Birds, animals, people, he managed to tesselate them all. Despite this he didn't find it easy. He said:
"...later the designing of new motifs came with a rather less struggle than in the early days, and yet this has remained a very strenous occupation, a real mania to which I become enslaved and from which I can only with great difficulty free myself."
Tesselator makes this previously difficult process simple: you need no experience in maths, computing, art or design to use the programs. With Tesselator you can design, decorate and colour hundreds of your own tesselating patterns. Either start with a shape in mind and work towards it, or simply experiment until an interesting shape emerges (it won't take long).
Triangle Mosaics
The second section produces patterns based on circles and spirals made of triangles! This might sound confusing but it means that with a minimum of keystrokes you can fill the screen with a spectacular variety of patterns. Experimenting with the effect of different starting shapes is half the fun.
Patchwork Patterns
The third section is based on a 'picking and dragging' program which you can use to colour and place shapes on the screen to make patchwork patterns. The program is unprotected and you are welcome to modify it as you wish, or use parts of it in other programs of your own.
Penrose Tesselations
The final section is based on Penrose tesselations. Although only two shapes are used they can be arranged to form a vast number of patterns (in fact it has been proved mathematically that there are more than an infinite number of different possible tesselations). A remarkable property of these tesselations, which the program takes full advatage of, is that complex large patterns can be generated automatically from the simplest beginnings.
This manual describes in detail how to use each of the four sections and gives plenty of illustrated examples for you to try. These are only a very small proportion of what is possible with Tesselator. Literally thousands of original and colourful patterns and designs can be generated by Tesselator and your imagination working together.
Tesselator has great potential for educational use. At the end of the manual David Jesson of the Division of Education, University of Sheffield, has contributed a guide for teachers who want to use Tesselator as part of their mathematics courses.
Escher Tesselations
Designing a Shape
Put the Tesselator cassette or disc into your tape recorder or disc drive and type:
*RUN SHAPER
and press RETURN. The screen will look like this:

(This image will appear almost immediately if you are using a disc, but will take longer from a cassette. For the moment you can ignore the message 'Fixed vertex' at the bottom left hand corner of the screen.)
This square on the screen is the basis of your tesselating shape. Yu control the position of the large cross on the square from the keyboard. Pressing C moves it clockwise round the square. A moves it anti-clockwise. Press C a few times. The large cross marks the position where the square will be deformed. To see what this means press the left arrow key a few times. Now the square will look like this:

You can see that when you deform one side of the square, the opposite site moves to match it. This is the program ensures that the shape will always tesselate. To see that this is so, press T (for tesselate) and when the computer asks for a scale factor enter 1 and press RETURN. The screen will now look like this:

This is the tesselation pattern of the simple shape you have made. Press P (for planning) and you will see the shape on its own again. By using A, C and all four arrow keys you can make further deformations to produce a shape that resembles a cat's head:


The shape has been tesselating at each stage although this is not essential. However, you might like to try entering differing scale factors such as .5 or 2 and see what effect this has.
By now you may have realised what the messages at the bottom left hand corner of the screen mean. The original corners (or vertices) of the square cannot be moved by the arrow keys as this might destroy the tesselating property of the shape (if you try it the computer will beep at you). The message 'Fixed vertex' appears when the cross is on one of these immovable points. When the cross is on an 'Edge' or 'Moveable vertex' (i.e. a corner or vertex that has been made during deformation) the appropriate message is displayed and you can use the arrow keys to deform the shape further.
Saving a Shape
When you have arrived at a shape that you like you can save it to use later. In fact you must save it if you want to decorate and colour it. As you use Tesselator you will probably want to save a large number of shapes so it is a good idea to use a separate cassette or disc specifically for this purpose. Insert this cassette/disc into your recorder/disc drive and press S. Now you have to enter a name for the file in which the shape will be stored. You should always use meaningful filenames so, for instance, you could store the cat's head shape in a file called CAT. Type CAT and press RETURN. If you are using a cassette you must now press the record control on your recorder and then RETURN again. The system will tell you when saving is complete.
Decorating a Shape
You can now start to colour and decorate your shape. Press BREAK and then put the Tesselator cassette/disc back in the recorder/disc drive. Type
*RUN DECOR
and press RETURN. When the DECOR program is loaded it will ask for a shape file name. Replace the Tesselator cassette/disc in your recorder/disc drive with the cassette/disc containing CAT (don't forget to rewind the tape if necessary). Now type CAT and press RETURN. The system will tell you when the shape has been loaded. Tesselate as before by pressing T, entering a scale factor, and press RETURN. The tesselating cat will appear on the screen.
Now press P (for paint). The single cat's head will come up on the screen and fill with colour. This is how it looks during this process.

Now tesselate and you will see this:

The tesselation is displayed in a black and white checkerboard pattern. Try pressing the keys 1 and 2 a few times and see what effect this has. Now press M and tesselate again. Experiment with keys 1, 2, 3 and 4 this time: you will soon begin to realise the power and fascination of Tesselator.
Press M again and the message 'Now in two colour mode' will appear. In this mode you can add decoration to the shape by pressing D. Once again you will see the simple cat's head shape on the screen with a cross on it. Think of this cross as the point of a pencil that you can use to draw on the shape. Use the arrow keys to move the cross to where you want to start drawing, and press F to put the 'point' onto the surface. (All the lnes you draw must be inside the shape: the program will let you draw outside but these lines will not appear in any tesselations.) Use the arrow keys to move the cross which will now draw a line. When the line is drawn as you require press F again to fix it in place. You can draw a new line from the end of the fixed line in the same way, or start a separate line by pressing O, moving the cross to a new position, pressing F and drawing as before. Here is the cat in the process of being decorated.

You can tesselate any any time to see the full effect of the decorations you have added.

Press D if you want to continue adding decorations to the shapes.

If at any stage you decide that you don't like what you have drawn, and want to start again from a blank shape press ESCAPE. First you will be asked if you want to load a new shape. As you only have one shape saved so far (CAT) you should press N for No. Now, when you are asked if you want to wipe the shape clean press Y for Yes and then, when told to carry on, press D and start drawing again.
Saving a Decoration
When you have decorated a shape to your liking you can save it. Make sure that the cassette/disc on which you saved CAT is in the recorder/disc drive. Now press S and you will be asked for a decoration file name. Again you should use a meaningful name: in this case you could use DCAT (short for Decorated Cat). The procedure for storing decoration files is exactly the same as for shape files.
Because shapes and decorations are stored in separate files you can save a number of decoration schemes for any one shape. For instance, you could draw and save a happy cat's face (in DHCAT), an angry cat's face (in DACAT) a sad cat's face (in DSCAT) and so on. Once you have drawn and saved these faces on cassette or disc you can load a particular one back into the system by pressing L and entering the appropriate file name.
Pegasus: Another Shape to Try
If you think you have seen enough of cats for the time being, try developing the pattern shown here, which is based on a famous tesselation by Escher himself.
picBA
picBB
picBC
picBD
picBE
picBF
picBG
picBH
picBI
picBJ
Commands
You have now used and should be familiar with all the commands in SHAPER. To summarize, these are: A move cursor anti-clockwise C move cursor clockwise L load a shape G (disc only) get a different starting grid P switch to planning mode S save shape T tesselate ↑, ↓, ←, → deform the shape ESCAPE interrupt the program SPACE BAR stop drawing a tesselation DECOR has more commands, but you have used most of them already. A complete list is: B (disc only) make a binary dump file of a tesselated screen C colour layout change D decorate a shape F fix the start of a line or a point on the line L load a decoration file M mode change (2 or 4 colour) O lineoff and cursor on P paint a shape S save decorations T tesselate x extend off-screen plotting to the left X extend off-screen plotting to the right y extend off-screen plotting downwards Y extend off-screen plotting upwards 1, 2, 3, 4 instant colour change ↑, ↓, ←, → ESCAPE interrupt any process SPACE BAR stop tesselation The commands you have not used so far are C to change the colour layout x, y, X and Y to extend or reduce the plotting area and B to make a binary dump file of a tesselated screen. These will now be explained.
Colour Layout Changes
As you discovered earlier, the colour scheme of four colour tesselations can be changed with the keys 1, 2, 3 and 4. The effecs you can achieve with these keys are limited, however. For instance, although it is possible to make vertical columns of tiles 'disappear' (one way of doing this is to start from the initial colour layout and press 1 three times), no matter how you change the colours you won't be able to do the same for horizontal rows or diagonal lines of tiles. To see why this is, and what you can do about it, you must consider the arrangement of the colours in the four colour mode. This will be easier if you have a four colour tesselation on the screen while you read the rest of this section.
Look at the block of four tiles at the bottom left hand corner of the screen (parts of some of these tiles will be off the edge of the screen but this doesn't matter). The colour arrangement of these tiles can be summarised as:
1 on 4
2 on 3
4 on 1
3 on 2
where 1 is black, 2 is white, 3 is red and 4 is yellow. This means that the tile at the bottom left hand corner will have yellow decorations on a black background, the tile to its right will have red decorations on a white background, the tile above it will have black decorations on a red background. (Because some of these tiles go off the edge of the screen it may not be possible to see the decorations on all of them. However, unless you used a large scale factor, you will be able to find a block of four tiles somewhere on the screen that look like this.)
Now you should be able to see how the colour changes work. Each time 1 is pressed colour 1, which is black initially, changes colour. When 1 has been pressed three times colour 1 is yellow, the same as colour 4 so the tiles arranged '1 on 4' and '4 on 1' appear as solid yellow. Similarly, pressing 2 twice will change colour 2 (initially white) to red, so the tiles '2 on 3' and '3 on 2' will appear as solid red.
To increase the range if possible effects you can change the colour arrangements. Press C and the current layout will be displayed. One of the numbers will be underlined. If you want to change this number type in the new value (1, 2, 3 or 4), this will then appear in place of the old value and the underline will move to the next number. Again change this is you wish: if not, simply press the space bar. When you have made all the changes you want you can tesselate to see what effect they have had.
Try entering the following layouts, tesselating, and experimenting with the 1, 2, 3 and 4 keys.
| 3 on 2 | 3 on 1 |
| 3 on 1 | 3 on 2 |
| 1 on 3 | 2 on 3 |
| 2 on 3 | 4 on 3 |
| 1 on 4 | 4 on 1 |
| 2 on 3 | 3 on 2 |
Now see what you can come up with for yourself.
You can also use C to change the colour layout in the two colour mode, but as you can only work in black and white the results you can produce are more restricted.
Extending (or Reducing) the Plotting Area
You will probably have noticed that when a coloured and decorated shape is being tesselated there are short periods when nothing happens on the screen. This is because the program draws (or 'plots') the tesselating pattern over a larger area than the screen itself so that there are no gaps in the pattern on the screen.
Occasionally, for some kinds of tesselation the program does not do enough off-screen plotting, and black spaces appear at the edge of the screen. To overcome this problem, should it occur, you can increase the area of plotting with the following keys.
x to extend the plotting area to the left
X to extend the plotting area to the right
y to extend the plotting area downwards
Y to extend the plotting area upwards
Entering any of these commands will result in a request for the extent of the increase. Type a number indicating (in 'screen units') approximately how much further you want to extend plotting off the screen in the specified direction (the screen is divided into 1280 units across and 1024 units up).
The amount of off-screen plotting can be reduced by supplying a negative number to some or all of these commands. This will give a patterned patch in the middle of the screen.
Take care when using x and y to change back to capital letters before entering any other commands.
Saving a Screen Display
With the disc version of Tesselator, it is possible to save a screen display of a tesselation in a disc file. This has two uses. Firstly, reloading the file will display the tesselation directly on the screen more quickly than letting it build up from a shape and a decoration file. Also, the file will provide an interface with your printer, making it possible to print out the tesselating patterns you have created.
To create such a file press B (for binary screen dump) when the tesselation you want to save is on the screen, and you have a disc in the disc drive. The image on the screen will now be stored in a file called SCREEN.
Now you can display the saved tesselation by running a program such as:
10 MODE 4
20 *LOAD SCREEN
The screen file can of course be renamed. A set of such files could be used to display a series of screen images in rapid succession.
If you have a screen dump routine for your printer, a binary screen dump provided by Tesselator can be loaded and printed. Because of the variations between different printers Tesselator does not include a general screen dump routine. A rutine for one of the most popular printers, the EPSON MX-80 is available, however. To run it, put the disc containing the SCREEN file into the disc drive, and then type:
LOAD"EPSONPR"
RUN
and press RETURN.
Tesselation Grids
The two patterns you have seen so far (the cat's face and the flying horse) were developed from the same starting square, and were tesselated as if they were being placed on the squares of a checkerboard. This is the arrangement that is loaded when you start to use SHAPER. There are many other possible arrangements, however, and these are included in Tesselator. The majority of them are made up of a grid of squares that have been translated (moved around but kept the same way up), rotated (turned like a wheel) and/or reflected (as if in a mirror). Arrangements based on other shapes are also available in Tesselator.
Square Tesselations
In the simple checkerboard tesselation the square is only translated. Here is another example of a starting grid for the square involving only translations. This starting combination has been used to create a 'flying fish' tesselation.
picCA
picCB
picCC
picCD
The vertical translation of the simple tesselation grid has been replaced by a combined vertical translation and horizontal shift. This starting combination is available as the file SQU2.
Note that in this example the initial square behaves as if it has six vertices and six edges. In a tesselation, the left hand of the top edge of the square meets copies of the right half of the bottom edge of the square. Deforming the left half of the top edge causes a maching deformation to the right half of the bottom edge. The two halves of the top edge are independent of each other, as are the two halves of the bottom edge.
Square Rotations
We have included a number a possible starting grids for the square that involve rotations. An easy way of explaining how a starting shape is being tesseated is to place a completely unsymmetrical pattern on the shape and display a tesselation. For this purpose, we will make a square with a large letter F. Thus a tesselation grid for the square that involves 90 degree rotations can be described as follows:
picCE
If you take as the standard tile a square in which the F is the right way up, it is easy to see that, in a tesselation, the left hand edge of the standard tile always meets a copy of the top edge that has been rotated through 90 degrees. Thus a deformation on the left edge of thes quare requires a compensating deformation on the top edge of the square and vice versa.
This starting combination is available as the file SQU4 and you should try it in order to help your understanding of the properties of this tesselation grid.
Here are some stages in the conversion of this grid into a lizard-like tesselation similar to the one used by Escher: picCF picCG picCH picCI picCJ picCK picCL picCM picCN picCO picCP picCQ A number of grids for the square involving 180 degree rotations are also available and are described in the complete list at the end of this section.
Square Reflections
Several possible tesselation grids for the square involve reflections. For example, here is a grid in which squares are reflected in a vertical axis. This combination is available as SQU10.
picDA
Again taking a square with an F the right way up as the standard, you should see that the top edge of this square always meets the bottom edge of a copy of the square and vice versa (As is the case in the simplest translation grid for the square). The left edge of the square always meets a reflected copy of the right edge of the square. Thus deforming the left edge of the square requires a compensating deformation at the opposite end of the right edge. Again you will have to try this to get a feel for what happens.
Here are the stages in the construction of a tesselation from this starting combination (we call it 'Frog reflections').
picDB
picDC
picDD
picDE
picDF
Tesselating Triangles
Three starting combinations are available that use an equilateral triangle as the initial shape. Two of these involve rotations and one involves rotations and reflections. Here is an example of the build-up of a shape from the combination TRI2:
picDG
picDH
picDI
picDJ
pidDK
picDL
Tesselating Hexagons
Three starting combinations are available that use a hexagon as the initial shape. One involves only translations, one involves rotations and the other involves reflections. Here is an example of the build-up of another lizard-like shape from the starting combination HEX2:
picDM
picDN
picDO
picDP
picDQ
picDR
picDS
picDT
picDU
Multiple Tile Sets
Some of Escher's tesselations involve sets of two or more different tiles. Copies of these tiles are used in groups to cover the plane. In one well-known Escher picture, a group of 12 different bird shapes is repeated to form a tesselation of the plane!
Tesselator allows the design of a pair of different tiles that tesselate. There are three different starting combinations listed at the end of this section.
Here is an example of such a tesselation constructed from two squares that tesselate by simple translations (file SQUARES). You should try this combination to see how it behaves.
picEA
picEB
picEC
Here is a build-up sequence for another 2-tile tesselation based on an Escher drawing. In this case, the starting shapes are quadrilaterals.
picED
picEE
picEF
picEG
picEH
picEI
picEJ
Starting Shapes and Tesselation Grids
On the following pages, each available combination of a starting shape and its tesselation grid is described. Apart from the first, which is loaded automatically when SHAPER is run, each one is stored in a file. To use a particular shape and grid press L if you are using the cassette version or G if you are using the disc version, and then enter the appropriate filename.
Although a description of the mathematical transformations involved in generating each tesselation grid is given you can ignore the mathematics if you wish - the pictures tell it all! Filename the first starting combination is not available as a file. It is always available when SHAPER is sarted up and can always be returned to by pressing ESCAPE Shape a single square Transformations horizontal translation veritcal translation picFA picFB Alley cats picFC Pegasus Filename SQU2 Shape a single square Transformations horizontal translation combined vertical translation and horizontal shift picGA picGB Kneeling dogs picGC Flying fish Filename SQU3 Shape a single square Transformations vertical translation combined horizontal translation and vertical shift picHA picHB picHC, picHD Camels Filename SQU4 Shape a single square Transformations 90 degree rotation picIA picIB picIC Whales Filename SQU5 Shape a single square Transformations 180 degree rotation Filename SQU6 Shape a single square Transformations horizontal translation 180 degree rotation Filename SQU7 Shape a single square Transformations vertical translation 180 degree rotation Filename SQU8 Shape a single square Transformations horizontal translation 180 degree rotation Filename SQU9 Shape a single square Transformations vertical translation 180 degree rotation Filename SQU10 Shape a single square Transformations vertical translation combined horizontal translation and x-axis reflection Filename SQU11 Shape a single square Transformations vertical translation combined horizontal translation, vertical shift and x-axis reflection Filename SQU12 Shape a single square Transformations horizontal translation combined vertical translation, horizontal shift and x-axis reflection Filename SQU13 Shape a single square Transformations horizontal translation combined vertical translation and y-axis reflection Filename SQU14 Shape a single square Transformations horizontal translation combined vertical translation, horizontal shift and y-axis reflection Filename SQU15 Shape a single square Transformations vertical translation combined horizontal translation, vertical shift and y-axis reflection Filename SQU16 Shape a single square Transformations combined horizontal translation and reflection in x = y combined vertical translation and reflection in x = y Filename SQU17 Shape a single square Transformations combined horizontal translation and reflection in x = -y combined vertical translation and reflection in x = -y Filename HEX1 Shape a single hexagon Transformations horizontal translation combined vertical translation and horizontal shift Filename HEX2 Shape a single hexagon Transformations 120 degree rotation Filename HEX3 Shape a single hexagon Transformations horizontal translation combined vertical translation, horizontal shift and y-axis reflection Filename TRI1 Shape a single equilateral triangle Transformations 180 degree rotation Filename TRI2 Shape a single equilateral triangle Transformations 60 degree rotation 180 degree rotation Filename TRIANGS Shapes two isosceles triangles Transformations combined translations and 90 degree rotations Filename QUADS Shapes two quadrilaterals Transformations horizontal translation vertical translation SHAPER: Complete List of Commands A for Anti-clockwise (planning mode only) Move the planning cross round the outline in an anti-clockwise direction C for Clockwise (planning mode only) Move the planning cross round the outline in a clockwise direction G for Get a grid (disc version only) Load a predefined starting combination. When asked, type the name of the file and press RETURN. L for Load Load a predefined starting combination (cassette version only) or a previously saved 'shape file'. When asked, type the name of the file and press RETURN. P for Planning Switch back to planning mode. S for Save Save details of the current outline shape in a 'shape file'. When asked, type the name of the file followed by RETURN. T for Tesselate Draw a tesselation using the current outline shape ↑, ↓, ←, → (planning mode only) Deform the shape at the point marked by the planning cross. ESCAPE Interrupt the program at any point. You will be given the option of returning to the simple square that is usually available when you start up SHAPER SPACE bar (when tesselating only) Interrupt the program while a tesselation is being drawn. The partially completed tesselation will be left on the screen. DECOR: Complete List of Commands Decor always starts by loading a shape file and the program will not continue until a file has been successfully loaded. Type the name of the shape fle followed by RETURN. B for Binary screen dump (disc version only, while a tesselation is on screen) Save the screen as a binary dump in a file called SCREEN C for Colour layout Change the basic colour layout used when tesselating. Type a new colour number as each old colour number is underlined. D for Decorate Draw the shape (with any previously added decorations) and prepare to draw decorative lines on the shape. F for Fix Fix the start of a line at the point marked by the cross or fix a point on the line currently being drawn. L for Load Load a previously saved decoration file. M for Mode Change Switch between two-colour Mode and four-colour (low resolution) Mode. O for line Off and cursor On Switch the cursor cross on so that it can be moved to the start of a new line. P for Paint The computer works out how to colour fill the shape. S for Save Save decorations, colouring information and colour layout information in a 'decoration file'. When asked, type the name of the file followed by RETURN. T for Tesselate Draw a tesselation using the current shape. When asked for a scale factor, type a number in the range 0.2 to 4. If the shape has been painted (P command), then the shapes in the tesselation are coloured as described in the colour layout for the shape (which can be changed using the C command). If the shape has been decorated (D command) then each copy of the shape in the tesselation is decorated. x Extend off-screen plotting to the left X Extend off-screen plotting to the right. y Extend off-screen plotting downwards. Y Extend off-screen plotting upwards. SPACE bar Interrupt a tesselation. ↑, ↓, ←, → (while decorating only) Move the decorating cursor (a cross) or extend the line being drawn. 1, 2, 3, 4 (only when a tesselation is on screen) Instantaneously change the screen colour associated with colour number 1, 2, 3 or 4 (Only keys 1 or 2 can be used in two-colour mode.) ESCAPE Interrupt any process. You will be asked whether you want to load a new shape file. If you don't, you will be asked whether you want to wipe the current shape clean. Triangle Mosaics The new program in Tesselator is in the same family as the Escher programs, but is rather less general than these. It allos you to experiment with variations on a well-known family of tesselations. These tesselations are based on a circular pattern of isoceles triangles arranged round a central point.
picAA
This pattern can be varied by cutting the pattern in half across the central line and sliding the two halves apart by an amount equal to the length of the long side of the basic triangle. This gives a sprial pattern.
picAB
If the two halves are moved by two steps instead of one, we get:
picAC
and so on:
picAD
Designing a Shape
To run the program type:
*RUN TRIANG
and press RETURN. Now specify the basic shape of the triangle by choosing an angle between the two long sides. This must be a whole number that divides exactly into 180. The patterns shown earlier were produced with an angle of 20. When you have entered your chosen angle, the program will ask you to choose the number of points along one of the long sides of the triangle at which you want deformation to occur. This can be any number between 2 and 20. For the time being enter a low value such as 4 or 6.
Now you will see your basic triangle on the screen. The cursor is at the point where the two long sides meet, and the deformation points are makred with small crosses. Press C to move the cursor clockwise, or A to move it anti-clockwise, and it will jump to the first deformation point in that direction. As you start to use the arrow keys to deform the shape you will notice that four points move at the same time. This is because of the way the triangles tesselate.
If you look at the illustration of the basic tesselation you will see that the triangle can meet in two ways: like this
picBA
where each long side meets a copy of the other long side (i.e. ab meets ac), or like this
picBB
where each side meets itself turned through 180 degrees (i.e. ac meets ca). (The letters a, b and c do not appear on the screen.) The deformations must allow for both of these possibilities, so when one side is deformed at one end the other end must deform in the opposite direction ( to cover the case where a side meets a copy of itself) and the opposite side must deform in two places to match (to cover the case where the two sides meet copies of each other).
picBC
The triangle cannot be deformed at its three original vertices, anywhere along its short side or, if you have chosen an odd number of deformation points, at the central point on each side.
Tesselating the Shape
Use the command T for Tesselate. You will be asked for the scale to be used. A fairly small value between 0.1 and 0.3 will usually be best.
When you have supplied a scale, you will be asked for the shift between the top and bottom halves of the tesselation. A shift of 0 gives a circular pattern while shifts of 1 or more give rise to various spiral patterns.
To stop the tesselation process, hit the space bar and it will stop after the next complete circle of triangles has been plotted.
picBD
picBE
picBF
picBG
Colouring a Shape
Press P to switch back to planning mode. The command F for Fill can be used to tell the program to work out a colouring sequence for the shape. When this has been done, the shapes in a tesselation will be plotted alternately in black and white. Switching back to planning mode will make the program 'forget' the colouring sequence and if a colour-filled tesselation is subsequently required, the F command must be used again.
picBH
picBI
picBJ
picBK
Changing Colours
While a tesselation is on the screen (after it has been stopped with the space bar), keys 1 and 2 can be used to experiment with different colour combinations. Pressing key 1 will change the colour of the areas of the screen that are initially black. Repeatedly pressing this key will cycle through all the possible colours for these areas. Key 2 can be used in the same way to try different possible colours for the areas that are initially white. ESCAPE The ESCAPE key can be used at any time to interrupt the program. The screen will be cleared and you will be asked if you want to specify a new triangle. (Answer Y for yes or N for no).
Command Summary
A Move the cursor anti-clockwise round the planning shape C Move the cursor clockwise round the planning shape F Work out a colour Fill sequence for the shape P Switch back to Planning mode T Tesselate the shape 1, 2 Change colours on the screen ↑, ↓, ←, → Deform the shape at the current point ESCAPE Interrupt any process SPACE BAR Stop the tesselation after next complete circle
Patchwork Patterns
A patchwork quilt is made up of shaped pieces of material placed edge-to-edge in a pattern and sown together. Tesselator produces patchwork patterns in a similar way, using a technique known as 'picking and dragging'. The program lets you pick a shape and drag it to any chosen position on the screen. By repeating this process to add more shapes, complex pictures can be built up. Starting Up To start the picking and dragging program, type CHAIN "PATCHES" or LOAD "PATCHES" RUN
Picking and Dragging a Shape
You will see a message at the top left of the screen telling you which keys you can use. This will read HTP where H (for hexagon) and T (for triangle) are the shapes you can pick. The other command key P is explained below. If you press H or T, the shape you have chosen will appear near the bottom of the screen. Use the arrow keys to drag the shape to your chosen position. Pressing C will rotate the shape clockwise and A will rotate it anti-clockwise.
Fixing a Shape
When you have positioned the shape, press F to fix it in place. You can now pick and drag the next shape in your pattern. It may seem difficult to position two shapes next to each other accurately using the arrow keys. The program takes care of this by keeping a record of the position of the vertices of all shapes fixed. When a new shape is being fixed in position, all existing vertices are checked to see if they are close to a vertex of the new shape. If a new vertex and an old vertex are close, then the new vertex is positioned accurately on top of the old vertex.
Painting a Shape
If you want to colour a shape you must press P before you pick and drag it. The program is now in 'painting mode'. When you have picked, dragged and fixed a shape you will be asked to choose one of three colours. Press R for red, Y for yellow or W for white and the shape will fill with the colour you have chosen.
Program Listing
This program is unprotected and has been carefully structured and written so as to be easily readable. You are welcome to experiment with modifications to this program, or to use the procedures in other programs. The programming techniques used as described in The Art of Microcomputer Graphics by Jim McGregor and Alan Watt (Addison-Wesley).
10MODE1:
... etc ...
Using Other Shapes
As well as the hexagon and triangle, three other sets of shapes that are used in traditional patchwork designs are available for use with this program. The set of shapes used by the program are described in a set of DATA statements from line 5000 onwards. To use a different set of shapes, a different set of DATA statements must be loaded
File SDT1 Load PATCHES and type
*EXEC SDT1
This will load the following DATA statements:
4995REM DATA for S(quare), D(iamond) and T(riangle)
5000DATA 3,SDT,5010,5020,5030,45
5010DATA 4,-100,0,0,100,100,0,0,-100
5020DATA 4,-50,-120,710678,-50,120.710678,50,120.710678,50,-120.710678
5030DATA 3,-100,0,50,120.710678,50,-120.710678
Example, a traditional patchwork design:
picCA
File SFT2 Load PATCHES and type
*EXEC SDT2
This will load the following DATA statements:
4995REM DATA for S(quare), D(iamond) and T(raingle)
5000DATA 3,SDT,5010,5020,5030,45
5010DATA 4,-100,0,0,100,100,0,0,-100
5020DATA 4,70.7106781,-70.7106781,-100,0,-70.7106781,70.7106781,100,0
5030DATA 3,-100,0,100,100,0,-100
Examples, traditional patchwork designs:
picDA
picDB
File SRT Load PATCHES and type
*EXEC SRT
This will load the following DATA statements:
4995REM DATA for S(quare), R(hombus) and T(riangle)
5000DATA 3,SRT,5010,5020,5030,45
5010DATA 4,-100,0,0,100,100,0,0,-100
5020DATA 4,-100,0,100,100,100,0,-100,-100
5030DATA 3,-100,0,100,100,0,-100
Example, a traditional patchwork design:
picEA
PATCHES Command Summary
Penrose Tesselations
Periodic and Non-Periodic Tesselations
Tesselations can be divided into two types: periodic and non-periodic. A periodic tesselation is made up of a tile or group of tiles that are repeated again and again in the same arrangement. Non-periodic tesselations do not repeat in this way.
Suppose that you had discovered a tesselation and wanted to find out if it was periodic or non-periodic. You could do this by copying the tesselation onto a large sheet of tracing paper. If, when you put the tracing on top of the actual tesselation you found that you could move it, without rotating it, to another position on the tesselation where it would still fit, the tesselation is periodic.
Many of the best-known tesselations are periodic. All the tesselations produced by the program SHAPER fall into this category. A large number of shapes that tile periodically will also tile non-periodically. For example, an isoceles triangle tesselates periodically in various ways.
picFA
picFB
The same shape also tesselates non-periodically in the circular and spiral patterns produced by the TRIANG program.
picFC
picFD
(Although the circular and spiral patterns are 'non-periodic', they are obviously highly regular.)
All known examples of single tiles that tesselate in a non-periodic fashion will also tesselate periodically. However, it is possible to construct sets of two or more tiles that tesselate only in a non-periodic fashion. Finding such sets of tiles is by not easy. Until a few years ago, it was believed that no such set existed!
The Penrose Kite and Dart
By far the most interesting and entertaining set of tiles that force non-periodicity is the pair of tiles known as the 'kite' and 'dart'. These were first described by the British mathematician, Professor Roger Penrose. The two tiles are constructed by cutting a rhombus in two as illustrated:
picGA
Rejoining a kite and a dart to form a rhombus will give rise to a periodic tesselation. However, we forbid this way of joining the tiles as well as any others that could give rise to a periodic tesselation. The rules are very simple.
When the program operates in colour, the edges of the two shapes are drawn in red and yellow. When a shape is moved into place, a red side must always be put on top of a yellow one and vice versa.
When operating in black and white, some edges are drawn as continuous lines and others are drawn as dotted lines. A continuous line must always be placed on top of a doted line and vice versa.
An attractive alternative method for indicating permitted joins and decorating the tiles at the same time is to draw two coloured arcs on each tile, in two different colours. The arcs can be positioned such that, for each permitted joining of two tiles, two arcs of the same colour meet at the common edge. In a tesselation where the tiles are marked in this way, these arcs join together to produce coloured circles and curves that add to the beauty of the pattern.
picHA
picHB
In the two Penrose programs, whenever a kite or a dart is fixed in place in a tesselation, it is decorated in this way (if the program is operating in colour).
Tesselations using Penrose kites and darts have an amazing variety. In fact, it has been shown that the possible tesselations of the plane with these shapes are not only infinite, but are uncountable ('more infinite' than the set of integers). A warning has been given by one writer that, because of this infinite variety, tiling with Penrose kits and darts is habit-forming. Perhaps the reason that the patterns are so pleasing to the eye is because the lengths of the long and short edges are in the 'golden ratio' (1.61803...) much used in classical painting and architecture.
An excellent description of Penrose kites and darts and some of their mathematics and 'folklore' appeared in Martin Gardner's column in Scientific American, 1975. If you find these tesselations interesting, you will find it well worth the trouble of looking out this issue and reading the article.
There are two programs for manipulating Penrose tesselations in Tesselator. The first is a picking and dragging program that works in the same way as the PATCHES program. The second will take patterns produced by the first and expand them automatically.
Picking and Dragging Program
To run the program type
*RUN PENROS1
and press RETURN. You will be asked whether you want to operate in colour and should answer Y for yes and N for no. Operating in colour requires much more memory space and restricts the number of tiles that can be handled. Operating in black and white will allow the construction of tesselations containing several hundred tiles. The program will tell you the maximum number of tiles that can be handled in the mode chosen.
Creating a Pattern
When the main program has loaded, it enters 'picking' mode and a list of teh currently valid command letters will appear at the top left of the screen. When the program is in this state, you can either choose a shape to be dragged into position or carry out some other operation on the pattern that has been constructed so far.
To choose a shape press K for kite and D for dart. The shape chosen will appear at the bottom of the screen with its sides drawn alternately in red and yellow if you are working in colour, or solid and dashed if you are working in black and white. This shape can now be dragged into the required position by using the arrow keys. While it is being dragged, its orientation can be changed by using the keys C to rotate it clockwise and A to rotate it anti-clockwise.
Remember that the rules for generating a true non-periodic tesselation require that, in colour mode, a red side must be placed on top of a yellow side and a yellow side must be placed on top of a red side. When this happens, you will find that the two colours reinforce each other resulting in white. If an illegal join is attempted, the two sides will vanish when they are superimposed.
In black and white mode, a continuous line must always be placed on top of a dotted line and vice versa.
While a tile is being dragged, none of the other commands (RSL) is available. They will only become available when the current tile is fixed and the program returns to picking mode.
When the tile has been dragged into its correct position, press F for Fix. You need not worry about positioning the tile absolutely accurately. The computer will do this for you when you fix it.
When a tile is fixed in colour mode, it is decorated with the circular patterns described earlier.
You can redraw your pattern to a different scale, or without the marked edges (coloured or dotted) that detract somewhat for the effectiveness of the pattern, but which are a useful guide when placing tiles. Press R and you will be asked whether or not you wish to keep the marked edges. Press Y for yes and N for no. You will then be asked for a scale to be used. A scale of 1 will leave the tile size in the pattern unchanged. A scale of 2 will double the size of the tiles, a scale of 0.5 will halve the size of the tiles and so on.
Any attempt to add a tile when memory space is exhausted will result in an error message. No further tiles can be added to the pattern, but the pattern can of course be saved.
Any process can be interrupted by pressing ESCAPE. You will be given the option of starting to build up a completely new tesselation.
Saving a Pattern
To save the current pattern on a file, type S for Save. You will be asked for the name of the file to be used. A previously saved pattern can be loaded by typing L for Load. You will be asked for the name of the file containing the pattern to be loaded.
PENROS1 Command Summary
PENROS1 Command Summary
The second Penrose program demonstrates an interesting property of Penrose tesselations. Given a tesselation that has been legally constructed, there is a simple set of replacement rules that can be used to automatically generate a more elaborate tesselation.
Each kite in a tesselation is replaced by a combination of two kites and two darts. The darts actually overlap neighbouring tiles, but their position always coincides with the new darts introduced as a rsult of replacing the neighbouring tiles. The diagram shows how a kite in the initial tesselation (heavy lines) is replaced by smaller kites and darts (dotted lines):
picIA
Each dart in a tesselation is replaced by a combination of one kite and two darts. The darts again overlap neighbouring tiles, but again their position always coincides with the new darts introduced as a result of replacing the neighbouring tiles. The diagram shows how a dart in the initial tesselation (heavy lines) is replaced by a smaller kite and darts (dotted lines):
picIB
This phenomenon is technically known as 'deflation', because kites and darts are being replaced by smaller kites and darts. However, because the process gives rise to a larger and more complex pattern, we prefer to call it 'expansion'.
The next photos show the first four steps in expansion, starting from a tesselation that contained a single kite.
picIC
picID
picIE
picIF
To run the expansion program, which can be used to expand any program generated and saved using PENROS1, type
*RUN PENROS2
and press RETURN. When the program has loaded, you will be asked whether you want to operate in colour and should reply Y or N. You will then be asked for the name of a file containing a tesselation to be operated on. When this tesselation has been loaded, a list of the valid command keys appears at the top left of the screen.
The loaded tesselation can be redrawn to any scale by pressing R for Redraw. You will be asked for a scale factor to be used. A scale factor of 1 plots the tiles at normal size, but large patterns may need to be plotted at a smaller scale factor in order to fit them onto the screen. Conversely, simple patterns can be plotted with a larger scale factor.
Accurate redrawing of a tesselation requires the use by the computer of a complex checking process. If you want the checks included, use the command A for 'Accurate redraw'. This will ensure that all lines in the pattern are accurately superimposed where appropriate.
The extra checks done require time and space. You will find that it takes much longer to plot the pattern. For a large pattern, accurate plotting will someimes run out of memory space and if this happens, you will have to use the normal Redraw command.
When a tesselation is on the screen, you will find that the list of permitted command keys is extended to include the characters 1, 2, 3 and 4 (1 and 2 when operating in black and white). These keys can be used to experiment with colour variations in the tesselation. Each time one of these keys is pressed, one of the colours on the screen will change.
Press E to expand the current tesselation. This carries out the expansion process on the current tesselation (or 'deflates' if you prefer) and generates a more complex tesselation. Press S to save the current tesselation.
If the program runs out of space while trying to expand a tesselation, the tesselation will have been destroyed by the attempt at expansion and a new file will have to be loaded. A warning is given if expansion is attempted when the program is running short of memory.
Any process can be interrupted by pressing the ESCAPE key. You will be given the option of loading a new tesselation from a file. If the expansion process is interrupted, then the stored tesselation will have been corrupted and you should reply Y for Yes.
PENROS2 Command Summary
PENROS2 Command Summary
'There are only seventeen basically different ways that repeating shapes can be designed so that they cover a flat surface'. This statement seems outrageously at variance with our experience: fabric and wallpaper designers have been at work for centuries and there doesn't appear to be any shorage of new designs!
The problem, of course, is with that word 'basically'. All the repeating designs we see: in tile and brick patterns, in carpets and fabrics, in wallpapers and elsewhere show many obvious differences from each other owing to their creators' interests and ingenuity. But if they are all repeating patterns that fit together in exactly the same way wherever you happen to be on the surface very important for curtain and dress makers, particularly so for wallpaperers!) then they have to obey the rules of space filling. It is those rules that set the upper limit of such designs to 17.
The mathematics of this depends on transformations in two-dimensional space, translations, rotations, reflections and glide reflections. Underlying it all are the ideas of 'groups' of isometries.
Mathematics, and mathematics teaching, has always been concerned with the search for pattern and order, and tesselations have played a valuable role in linking visually attractive designs to children's explorations of area, angle, symmetry and transformations. These considerations span the Junior and Secondary School age groups and also the divide between 'traditional' and 'modern' mathematics. The exploitation of the power of tesselation to integrate areas of mathematics has, up to now, occurred in relatively few schools. However, recent developments point the way to fundamental changes in the way that mathematics is to be taught in schools.
The Cockcroft Report (HMSO, 1982) concernd itself with the content, organisation and development of mathematics teaching in England and Wales. It is clear that the authros believe that many children's mathematical experiences are too narrow, and the way forward is to provide a framework in which all children are encouraged to explore and investigate matters of mathematical interest. The Report outlines six characteristics of mathematics teaching and learning that should contribute to the experience of each pupil. Among these is 'investigation' work opportunities for children to use their mathemetical, logical and common sense skills to explore, and seek to understand, situations that are novel to them.
In the last few years such opportunities have blossomed. The SMILE scheme, based in ILEA schools, uses investigational work as a basic omponent of the course for all children. The SMP 11-16 course builds these in as a regular part of the coursework, and the possibility of basing the overall assessment in mathematics on children's performance in them is being investigated. Both the Association of Teachers of Mathematics and the Mathematical Association have published a considerable amount, not only of investigational starting points, but also examples of children's responses to them. It is clear that the encouragement given in the Cockroft report is having an effect that is radical, challenging and wide-ranging. Perhaps, as has been said 'Maths teaching will never be the same again'.
Exploring tesselations has an obvious application in this area. It already appears in Maths for Schools (published by Addison-Wesley) as part of a primary level course, and also appears in material developed by the National Mathematics Project, soon to be published by Addison-Wesley as a secondary mathematics course.
It is in this context that Tesselator is so attractive. 'Spacefilling' links art and mathematics in a way that should encourage the desire to explore and create. At the very simplest level even the colouring in of a set of squares to keep a consistent pattern (as on a chess board for instance) is a satisfying activity in its own right, and the end result can be attractive visually for others too.
But here we want to go further and explore the ways that shapes can be altered but still retain the feature of fitting exactly with each other. This activity is, of course, not new. My room at University is decorated with examples enthusiastically created by people aged 8 to 38! In the past, however, these explorations and the resulting patterns would have almost certainly have been carried out by the dextrous use of tracing paper for creating the original design, and then by the (almost) infinite patience required to repeat each part in its appropriate place. With the powerful tools presented in Tesselator anyone can create a shape that will fill a surface by repetition: and the labour of then actually filling the space with this is handled quickly and accurately by the software. Thus the way is opened for genuine exploration, and for modifying and developing the shapes involved at will.
Principles of Repeating Pattern Design
This will be illustrated by referring to one simple exercise that has been used with children of different ages and abilities and has often resulted in sustained activity and some attractive and personalised designs.
A grid of squares is drawn, each square being, say, 10cm long. These can be thought of as tesselating by an upward and a horizontal slide or 'translation' of one side unit length. Diagram 1 shows a numbering system that can be applied to the 'starting square'.

The way that the resulting squares are labelled depends of course, on the particular movement that thas taken the starting square to that position. In Diagram 1, it is evident that sides 1 and 3 always fit together as do sides 2 and 4. This means that if any change is made to side 1, then to ensure that it alwas fits with side 3, an equal and opposite change should be made to that side. An example is shown in Diagram 2.
picJB

One way of doing this is to draw an outline square on card, and an identical square on tracing paper. A change made to one of the sides drawn on the card can then be traced onto the tracing paper and nge can then be transferred, in a complementary way, to the side it is paired with. Examples of this can be seen in Tesselator. At this stage the new shape is guaranteed to tesselate as we have only made compensating changes to two edges that fit together. However, actually making the shape tesselate involves transferring it onto every unit of the grid. This could be made easier by cutting out a card template but the process is fairly time-consuming. When the sequence of activities is completed the resulting design can be coloured and the endproduct is often an attractive, individually designed, simple repeating pattern. This is much more interesting to look at than the original group of squares and yet each shape has exactly the same area as the starting square and the effect of the translations that make up the basic pattern can be seen clearly.
The value of Tesselator is that it keeps track of the design and alters the corresponding side in exactly the right way and then allows the whole screen to be filled automatically with no further need for careful drawing by the user. In this way designs can be repeated experimentally 'just to see' what the finished product looks like. The colour fill algorithm is fascinating in its operation, so that coloured designs are straightforward to obtain.
The package extends the idea of complementary sides to designs based on other types of movement of the starting square on the same grid, and different grids and starting shapes such as triangles, hexagons and quadrilaterals. The basic principle however, is that outlined above, but the resulting designs can match some of the beautiful work created by the Dutch artist M. C. Escher who worked with litho prints from the mid 1930s until his death in 1972.
Diagram 3
Escher's work is quite startling to the mathematician because he was not aware, until quite late in his life, of the mathematical basis of his work. He was guided by an intuition of symmetry that proved curiously individual yet very productive (Diagram 3). Escher's work was stimulated by a visit paid to the Alhambra palace built in the 13th century by the Moors in Granada, in southern Spain. Here he saw examples of many different types of non-representational repeating patterns in the wall decorations and elsewhere (Diagram 4).

Such is the current interest in bringing this area more into the mainstream of mathematical investigatory work that the Association of Teachers of Mathematics planned in 1984 to take a group of mathematicians to Granada to compile an authoritative source book and teaching guide on the repeating patterns in which the palace abounds. The particular genius of Escher was that he took the principles that the Moorish designers had used and turned them into a vehicle for art rather than for abstract pattern. The Islamic religion forbade its followers to make any representation of living forms in its art in order to avoid the taint of making 'graven images' which might become objects of worship. All the designs in the Alhambra are therefore abstract; Escher's are not. It is his designs that have stimulated the activities available in this package.
Principles of Repeating Pattern Design
In a grid of equilateral triangles there are a variety of ways in which a starting triangle can be moved to cover the whole of the surface without leaving any gaps. One of these is to rotate the triangle about the vertex between sides 1 and 2 by 60 degrees. This forms a closed hexagonal figure after six rotations. If the starting triangle is then rotated by 180 degrees (a half turn) about the mid point of side 3 a new set of six triangles can be formed. The two operations will create a design that will fill all the space (Diagram 5).

To exploit these transformations in creating an attractive design we follow the basic principles outlined above (Diagram 6). Sides 1 and 2 are complementary so changes made to side 1 need to be compensated for by changes on side 2. From Diagram 5 it is clear that side 3 fits into itself, so any design that is point symmetric about its centre will complete the tesselating shape. It is now guaranteed that this new shape will fill all the space without leaving any gaps.
Tesselator is so arranged that once the grid has been chosen, and the particular form of 'transformation' decided upon, the corresponding sides are altered in exactly the appropriate fashion and appear immediately on the computer screen. In this way design is made simple and exploratory. At any stage the resulting tesselation can be shown and, if required, decoration and colour can be added to the repeating pattern.
An interesting example of the type of pattern than can be produced by Tesselator uses 'glide reflection'. This is shown in Diagram 7. Here the basic square is translated vertically as in our first example, but the horizontal move is carried out by first reflecting the square in the horizontal axis joining its midpoints and then translating the resulting figure horizontally. Sides 2 and 4 are related by the vertical translation so the complementary action is easy to obtain for these sides. Sides 1 and 3 are different, however, in that any design on side 1 must be repeated on side 3, but reflected about the line joining the midpoint of these sides. The repeating patterns resulting from these transformations have a characteristic feeling of motion about them.
In conclusion it must be said that working in this way can be very absorbing for children. In the classroom the package will have two quite distinct roles to play. The first is as a 'display' or 'electronic blackboard' where children can sit back and watch as the teacher creates shapes for tesselation.
Diagram 7
This could be linked with the 'expository' phase of Cockcroft's six characteristics of teaching. However, children will soon wish to be involved actively themselves, and here it will be that the second mode of use arises. Children, probably in pairs, can be allocated to the computer in exactly the same way as they can be given any other task in an individualised learning environment. Fortunately, designs can be saved so it is not necessary that the artificial limits of lesson length or the time allocated to any pair of children inhibit explorations of considerable detail. Indeed it is to be hoped that some of the designs so produced could become part of the wall decorations of the classrooms where the work takes place.
The authors would be interested to hear of designs that go beyond the possibilities available within Tesselator, with a view to developing an even more comprehensive resource for this work in schools. Exploratory and investigational work is to be encouraged.


