Blurb
A large-scale adventure game with 400 locations, each one depicted in high-resolution graphics and text. The program features a sophisticated multi-statement language interpreter which enables you to communicate using ordinary English sentences, and also to speak to the various characters you will encounter during your travels.
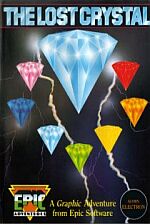
The Rainbow Crystal, which has protected the people of Zaloria for many years, has been struck by a mysterious bolt of lightning and shattered into seven pieces. You have been chosen by the Elders of Zaloria to seek out the seven coloured crystals and find a way to re-create the Rainbow Crystal and restore peace to the Free Lands.
This exciting game can be played either as a true adventure or by using the help book provided, as a piece of narrative fiction.
Welcome
Welcome to The Lost Crystal, a full-scale graphical adventure through a land of magic and mystery. You will be able to move around and explore this fantasy world by typing ordinary English sentences into the computer, which will respond by describing your surroundings in both words and pictures.
During your travels, you will meet various characters and monsters, some friendly, some hostile, and there will be many puzzles to solve. You will need to use a combination of logic and magic to defeat your enemies and successfully complete the adventure.
The game contains the following advanced features:
- 400 locations, each one depicted in colourful high-resolution graphics and proportionally spaced text
- Intelligent moving characters with whom you may communicate and interact
- Advanced language and speech interpreters capable of accepting complex commands in plain English
- Comprehensive position-save facilities
- Programmable function keys
Introduction
Long ago in the Dark Ages, the people of the Free Lands lived in fear of the dreaded Morgs from the Bad Mountains. Led by their ruler, the hideous Bogle, the Morgs were terrifying creatures who used Black Magic to bring misery and despair wherever they went. The villagers of the Free Lands were helpless to resist their power and it seemed as though nothing could stop the Morgs from destroying everything in their path.
One day, after a Morg raid has destroyed three neighbouring villages, the Elders of Zaloria held a meeting to discuss ways of overcoming the mighty force of the Morgs. Suddenly there was a bright flash of light and a stranger appeared in their midst. He held out a crystal which gave off a strange light of many colours.
"The Rainbow Crystal will protect you from the evil of the Morgs. It has life-giving properties and whilst it is in your keeping, the people of Zaloria and the Free Lands will never suffer illness or misery."
There was another flash of light and he disappeared.
The stranger was true to his word and for many years the Free Lands were peaceful and calm - until the sighting!
One of the villagers came running into Zaloria shouting hysterically and when the Elders managed to calm him down, he told of how he had seen a Morg up on the hills near the village. That night there was a violent storm and one of the Elders, worried by the story of the sighting, went to check on the Rainbow Crystal. As he stood looking at it, there was a terrific crash of thunder. A bolt of lightning struck the Crystal shattering it into seven small pieces. As the shocked Elder watched, each piece slowly formed into a replica of the original until seven different coloured crystals lay where the Rainbow Crystal once was. Suddenly, a swirling cloud of dust descended and engulfed the crystals. The cloud spun faster and faster until a small tornado developed and carried the crystals up into the night sky.
The next morning an aura of doom descended on Zaloria. The Rainbow Crystal was no more and several of the villagers were struck down by a mysterious illness; the first illness of any kind since the visit of the stranger years before. The villagers were in a panic. There was nothing to stop an invasion of the Morgs now that the Crystal was destroyed, unless the seven coloured crystals could be found and somehow re-formed back into the Rainbow Crystal. But without the protection of the Crystal, no-one would have the courage to set out on such a seemingly impossible quest - or would they?
The Elders have chosen you to try to save Zaloria and the Free Lands from the wrath of the Morgs by finding not only the seven coloured crystals but also a way of re-integrating them into the Rainbow Crystal.
As you set out on your long journey, the people of Zaloria wish you well and you can't help wondering whether you will ever see them again.
Loading Instructions
Because the adventure is so large, it is supplied on two cassette tapes, each of which contains two parts to the game, making four parts in all. To load the game into the computer, proceed as follows:
- Connect up your cassette recorder and computer in the normal way.
- Take the tape marked PART 1 and insert it, with that side uppermost, into the recorder. Make sure that it is fully rewound.
- Type CHAIN"" and press RETURN. (Disc owners should type *TAPE before attempting to load cassette software)
- Press PLAY on the recorder and wait for the first section to load.
- When this has loaded, a brief description of the game will appear on the screen. If your cassette recorder has motor control, the tape should stop playing at this point. If not, press STOP on the recorder.
- When you have read the text on the screen, press the space bar to allow the loading process to continue. If you have stopped your recorder, don't forget to press PLAY again.
- When the main program has loaded, you will see the message 'Press N to start a NEW game or L to LOAD a saved position. If you are playing the game for the first time simply press RETURN and leave the PLAY button pressed. The game will continue to load and you will be taken to the start of the adventure.
- If you have already completed part of the adventure and have saved your position on tape, press L in answer to the above question. In this case, you must insert your data tape into the recorder and follow the instructions on the screen. For a more detailed explanation of this, see the section headed Tape Handling.
Playing The Game
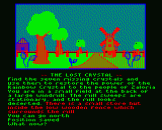
When the game has loaded, you will see that the screen is split into 2 parts. The top half of the screen shows a picture of your immediate surroundings. The bottom half contains a description of the location which you are in, and any other relevant test. If at any time during the game there is more text to be printed than will fit on one screenful, the printout will pause and you will hear a short beep. Pressing any key will allow you to read the rest of the text.
Entering Commands
When you see the message "What now?" the computer is waiting for your next command. Commands can be typed in at any time, and they will be executed when the computer is ready to accept them. Don't forget to press RETURN after each command. During command entry, you can use the DELETE key to delete characters back from the cursor, and CTRL/U to delete the whole line. You cannot use the CURSOR and COPY keys to copy characters from one part of the screen to another.
The program is equipped with an advanced language interpreter which allows it to understand complex multiple commands of anything up to 254 characters in length. On the other hand, it will cope just as readily with commands that consist of only a single letter. For example, to move about you can type WALK NORTH TOWARDS THE BUILDING, or just GO NORTH, NORTH or N on its own.
You can either enter your commands separately: UNLOCK DOOR. Or you can type multiple commands within the same sentence: TAKE THE KEY AND UNLOCK THE DOOR THEN OPEN IT. If you use multiple commands like this, the program is able to fill-in any missing words by searching back through previous parts of the command. For example, you can use the same verb to act upon a number of objects without having to retype it, eg: TAKE SPADE, FORK, LAMP AND HAMMER. It is also possible to perform a number of actions on the same object without having to repeat the name of the object, eg: TAKE THE SPADE, CLEAN IT, GO NORTH AND GIVE IT TO THE GARDENER. Here IT refers to the last object mentioned (the spade). You will notice that all of the above examples are phrased just as you would normally say them, and in general the program will be able to understand most complex commands providing that they make sense in ordinary English. You may also, for example, TAKE EVERYTHING or DROP ALL OBJECTS BUT THE LAMP.
Here are some more examples of correctly-worded commands:
|
TAKE THE MATCH AND LAMP. FILL IT AND LIGHT IT. TAKE THE MONEY AND RUN SOUTH TAKE THE KEY AND UNLOCK THE SHED DOOR WITH IT. GO INTO THE SHED, GET EVERYTHING FROM THE BENCH AND LEAVE AGAIN ENTER THE BOTTLE AND FILL IT WITH WATER FROM THE RIVER THEN GIVE IT TO THE BEAR. SIT DOWN AND EAT THE SANDWICHES AND DRINK THE TEA THEN GO NORTH TOWARDS THE MOUNTAIN |
As mentioned above, the program will also accept abbreviated words, and all of the commonly used commands can be abbreviated to a single letter. These abbreviations can also be used in multiple commands, so you could type something like T KEY, UNLO DOO, OPE, IN which is a shortened form of TAKE THE KEY, UNLOCK THE DOOR THEN OPEN IT AND GO INSIDE. There is a list of all the commonly used commands and their abbreviations at the back of this book.
Sometimes the program will not quite understand what you mean and will ask you a question about the command which you have just entered. In this case all you need to do is supply the missing word as requested, or you can retype the whole command if you like.
The game has been designed to be as user-friendly as possible, and at no stage in the adventure does the program insist on a strictly-worded response from the player. In other words, there is usually a number of alternative commands which can be used in each situation. Every attempt has been made to anticipate the player's likely responses, and to cater for them as much as possible. Therefore, if you are having trouble making the program understand you, and you have tried rephrasing your commands, you are probably doing the wrong thing!
Moving About
The four directional commands NORTH, SOUTH, EAST, WEST are used to move about in the game. Occasionally you will also need to use UP and DOWN. The description of each location includes a list of the possible exits from that location. Directional commands can be shortened to N, S, E, W, U, D and can also be strung together, eg: N, U, U, W, S, S, D, W, N, E. You can also type BACK To your previous location.
If you already know your way about, there are two ways of travelling through the adventure more quickly than by typing in the individual directions. The command CONTINUE (which may be shortened to C) will take you as far as is possible in the direction in which you last moved. For example, if you wanted to get to the other end of a long road you would take one step along the road then press C. This would take you along the road until you could go no further in that direction. Alternatively, if you wanted to travel just four paces to the east, simply press E then press the RETURN key four times. Pressing the RETURN key on its own like this repeats the last command. This works for any command, not just directional commands, but it is the most useful for this purpose.
You may be relieved to know that, like all Epic Adventures, there are no so-called mazes in this game. Directions are always logical, so that if you travel west then east you will always get back to your starting position. However it may still be advisable for you to draw a map of your travels as you go along.
Dealing With Objects
In order to complete the game you will need to manipulate and use the large number of objects that are scattered about the adventure. You can pick things up by typing TAKE followed by the name of the object, alternatively you can use GET. If you wish to drop an object, simply type DROP followed by the object name.
Just as in real life you can only carry a limited number of things at a time, so sometimes you will have to drop one of your objects before being able to pick up a new one. You may type INVENTORY or INV at any time during the game to see a list of the objects which you are carrying, if anything. (See the section headed The Other Characters.)
In order to use an object, it generally only necessary to be carrying it when attempting to do the job for which the object was designed. For instance, to unlock a door you need not type UNLOCK DOOR WITH KEY, but simply UNLOCK DOOR. The program will check to see whether you are carrying the correct key, and will inform you if you are not. On some occasions it will be necessary for you to be wearing an object, rather than carrying it. To wear an object, simply type WEAR followed by the object name. To remove it again, use REMOVE.
You need only specify which object you wish to use if you are carrying two objects which could be used for a similar purpose, and you specifically wish to avoid using the wrong one. For example KILL DRAGON WITH GUN or KILL DRAGON WITH SWORD. Because there are a number of different coloured crystals in the game, it is advisable to specify the colour of the crystal when referring to each one. If you do not do this, and there is more than one crystal in the room with you, the program will have to guess which one you mean, and it may not be the one you intended.
Unlike some games, it is not necessary to examine the objects in order to discover hidden secrets about them. All the information you need to know is given either in the description of the objects themselves, or in the associated text. You are, however, advised to READ all signs and notices, and anything else which may contain a written message.
The Other Characters
During your travels, you will encounter a number of other characters wandering about. You can interact with these in various ways, and can even walk to some of them. You will need to get these characters to help you at various stages of the game, either by getting them to perform certain actions, or by asking them for information. They may also want your help from time to time.
The movements of the other characters are not random, each has his own area of he game which he normally patrols. However, these areas may change at different stages of the game, according to the circumstances prevailing at the time. Whenever you meet another character, that character will remain in position until you move away. This is deliberate, and allows you to interact with the characters without them ignorantly walking away from you.
To get the other characters to help you, you will need to talk to them. You do this by enclosing any speech inside quotation marks. Eg: "OPEN THE DOOR". It is not usually necessary to identify the character you are talking to unless there is more than one character with you, and you think that the wrong one may also respond to the message. In this case you should type the character's name after the message: SAY "OPEN THE DOOR" TO THE GUARD. The quote symbol (") is obtained by pressing the shift key followed by the 2 key. It is vital that you remember to use the quote symbol when talking to people, otherwise the program will interpret your speech as a direct command which you are trying to perform yourself.
If you want someone to help you at a particular location, you must find first them and ask them to follow you (type "FOLLOW ME"). Lead them back to the location, then tell them what you want them to do, or ask them what you want to know. You can as them to stop following you if you get fed up with their company.
The characters may also carry around and use the various objects in the game, and objects may also be passed between you and the other characters. To give an object to one of the characters, simply type GIVE KEY TO GUARD. To take an object from a character you can either use the TAKE command or put GIVE in quotes. For example: TAKE KEY FROM GUARD or "GIVE ME THE KEY". Of course, the guard may not want to give his keys away!
Again, it is not necessary to specify the character if there is only one character with you at the time. If there is any confusion, the program will ask you who you mean. Therefore TAKE KEY will work whether the key is on the ground or it is being carried by somebody else. If the command is successful you will be told whether you picked the object up or were given it.
Remember, you can find out what the other characters are carrying by typing INV. This will give you a complete list of objects being carried by you and any characters in the room with you.
Saving Your Position
It may take weeks for you to complete the adventure. During this time you will need to save your position so that you may return to that same position at a later date. The saved position includes all details of what is happening everywhere in the game, including locations, objects, characters, etc. The program contains two methods of saving your position in this way: Save to tape and save to memory. There is also an automatic save facility whereby your position is automatically saved to memory approximately every eight moves you make, so that if you suddenly get killed you can return to the point just before it happened.
To save your current position in the game, type SAVE. You will be asked whether you wish to save your position to tape or memory. Press T or M at this point. The memory save is useful for short-term saves, for instance before you enter an unpredictable situation or try a dangerous manoeuvre. It is instantaneous and you do not need to fiddle about with recorders or tapes, but you may only save one position at a time. Every time you save our position to memory, it will overwrite any previous position that was stored there. The tape save is used for long-term and permanent storage of positions. You will need to use it before switching the computer off, and to keep a library of different positions on tape, and it only takes a few seconds to save each one. See the section headed Tape Handling for more information on how to use the tape save.
To a previously saved position, you may type LOAD at any time during the game. The program will again ask you whether you wish to load a position which is stored on tape or in memory. Press T or M as before. See the section headed Tape Handling for more information. After a loading operation, the game will continue from the exact point at which that position was saved.
The Autosave Facility
As mentioned previously, the autosave facility enables your position to be automatically saved to memory approximately every eight moves. You will be told when this happens. This feature is selected when the adventure is first loaded, but you may switch it off with the command SAVEOFF. Type SAVEON to switch it back on again. You may still save your position manually when the autosave is switched on, and it will automatically be switched off if you choose to save your position to memory. This prevents your saved position from being accidentally overwritten by the autosave.
Tape Handling
This section explains how to load the various parts of the adventure, and how to save your position onto tape and load it back in again.
New Part Numbers
As mentioned earlier, the whole adventure is split up into four parts on two cassette tapes. When you have completed one part, it will be necessary to load the next part to enable you to continue the adventure. This is taken care of automatically by the program. All you have to do is to place the appropriate cassette into your recorder and press the PLAY button.
As you finish each part of the adventure, you will get a warning message asking you to press a key to load the next part. When you press a key the screen will clear and a message such as "LOAD PART 2" will be displayed. All you need to do is to insert the tape containing the relevant part number into your cassette recorder and press the PLAY button. The new part will then load in and you will be able to continue the game. It takes less than three minutes to load a new part. The program will only load the correct part number, so if it doesn't load, check to make sure that you have selected the right tape and have rewound it back to the beginning.
Note that PART 1 does not start at the beginning of the tape due to the introductory files that are necessary when loading the complete adventure from scratch. Therefore, when loading PART 1, you can save time if you skip over these introductory files and go straight to the file named PART 1. This can easily be located by reading the loading messages that appear on the screen.
The SAVE Command
Typing SAVE at any time during the game allows you to save your current position to tape or memory. If you select the tape option you will be prompted to enter a filename. This allows you to give a different name to each position that you save so that you can identify it later. Type in any filename of seven letters or less and press RETURN. Make sure that you have placed a spare cassette in your recorder, and press the RECORD button(s). Press RETURN on the computer to save the position onto tape, it only takes a few seconds, after which you can continue the game. Always keep a spare tape with your positions on and never try to save your position on either of the two program cassettes that come with the game!
The LOAD Command
Typing LOAD at any time during the game enables you to load back a previously saved position from either tape or memory. You are also given the option to load a saved position whenever you would normally have to restart the game again. For example, when you type QUIT or get killed. The program will prompt you to enter the filename of the position which you wish to load in. If you do not know the filename, simply press RETURN and the computer will load the first file it comes to on the tape. When you have entered the filename, you will be reminded to insert your data tape into the recorder and press PLAY. The file will then be loaded in.
Please note that if you attempt to load in anything other than a valid position at this point, the computer will lock up and you will have to switch off and reload the entire program again. So if you have not specified a filename make sure that the program on your tape is a valid position file.
If you make a mistake when entering a filename and that particular file cannot be found on the tape, you can break out of the load function by pressing ESCAPE. You will then be able to re-enter the filename, or load a position from memory if you cannot find your data tape.
You may load back any position at any time during the game, even if it refers to a different part number from the one which you are currently playing. For example, if you are currently playing part 3 of the game and wish to go back to an earlier position which was saved when you were playing part 1, all you need to do is to load the position as normal. The program will know whether or not the position just loaded refers to a different part number from the one currently held in memory. If it does, it will automatically prompt you to load the new part number before continuing with the game.
Special Commands
Apart from the commands already discussed, there are a number of other commands which have a special purpose:
If you want to see a repeat description of your current surroundings, type LOOK or L. This will also tell you about any objects lying about, any characters that are with you, and list the possible exits.
The graphics may be switched on and off with the commands GRON and GROFF. Switching the graphics off allows the game to run faster and the whole of the screen is devoted to text output, thereby allowing more messages to fit onto the screen at once. However, you will not see any graphics, and some pictures contain extra clues. The graphics are switched on every time you load in a new position.
If you find that you are regularly entering the same command, or sequence of commands, you can save yourself lots of typing by setting up the command(s) on one of the 10 function keys. This is done by means of the STORE command. After typing STORE you will be prompted to enter the key number, then the sentence which you wish to store on that key. You can store any command sequence you like on a key, provided that the total number of characters on all the keys does not exceed 256, but you are unlikely to need anything like this amount. If you do try to exceed this limit, the program will warn you that the key store is full. You can place a RETURN character after the command by using |M just as if you were programming the keys from BASIC. See your handbook if you are not familiar with how to use the function keys. Once a command sequence has been set up on a function key, you can enter that command simply by pressing the function key. You will find that we have stored some example commands on the function keys at the start of the game. You are free to use these or change them as you require.
To find out what your current score is type SCORE. This will give you some idea of how you are progressing in the game. It is possible to finish the adventure without scoring maximum points. If this happens you may have missed something interesting along the way and you might like to play the game again to see if you can pick up the missing points.
If you get hopelessly lost or you want to let another player have a go, you can abandon the game by typing QUIT. The program will confirm with you that you really want to quit and will then give you the option of quitting or loading back a saved position. As usual, this saved position can be either from tape or memory. If you do decide to quit, you will be taken right back to the beginning of the game.
Hints And Tips
Light And Dark
In some areas of the adventure, such as caves and tunnels, there will be no natural light. In these places you will not receive a description of your surroundings unless you have a lamp or something similar with you. You do not have to be actually carrying the lamp, it can be carried by another character or placed on the ground. Remember, just because it is dark this does not prevent you from moving about, only from seeing where you are going!
Real-Time
You should be aware that the adventure runs in real-time. What this means is that the events in the game are not held up whilst you are sitting at the keyboard trying to decide what to do next. All the characters will act independently of you, and if you walk away from the keyboard for half an hour, you may return to a very different game! However so as not to penalise slow typists, once you have started to enter a command, the program will pause and wait for you to complete the command before continuing.
Summary Of Commands
Listed here are some of the more important commands which you will need to know in order to play the game, along with their abbreviations. It is not a complete list of the hundreds of words which are recognised by the program.
| Command | Abbrev. | Function |
| NORTH | N | Move north |
| SOUTH | S | Move south |
| EAST | E | Move east |
| WEST | W | Move west |
| UP | U | Move up |
| CLIMB | CLI | Climb up |
| DOWN | D | Move down |
| JUMP | JUM | Jump down |
| IN | Enter | |
| OUT | Exit | |
| BACK | Return to previous location | |
| CONTINUE | C | Travel as far as possible in one direction |
Special Commands
| Command | Abbrev. | Function |
| RETURN KEY | Repeat last command | |
| LOOK | L | Get description of current location |
| INVENTORY | INV | List objects carried |
| TAKE | T | Take an object |
| GET | G | Take an object |
| DROP | DR | Drop an object |
| EVERYTHING | ALL | Used with TAKE and DROP |
| EXCEPT | BUT | Used with EVERYTHING |
| GIVE | GIV | Give an object to a character |
| " | Speak to character | |
| SAVE | SAV | Save your position |
| LOAD | Load back a saved position | |
| SAVEON | Switch autosave on | |
| SAVEOFF | SAVEOF | Switch autosave off |
| GRON | Switch graphics on | |
| GROFF | GROF | Switch graphics off |
| SCORE | SC | Get current score |
| STORE | STOR | Define function key |
| QUIT | Q | Abandon current game |
| VERSION | VERS | Print version number of game |
More Useful Commands
| ATTACK | BREAK | CLOSE | DRINK | EAT | EMPTY |
| FILL | FOLLOW | KILL | MOVE | OPEN | PUSH |
| READ | REMOVE | THROW | UNLOCK | WEAR |
Helpsheet
Below is a comprehensive helpsheet to the game. This is an alphabetical list of all the locations, objects, characters and items referred to in The Lost Crystal. The location and purpose of each item is given, and the information provided in one entry will usually lead you to other items in the list. If you cannot find the word you are looking for, it probably plays no significant part in the game.
It is up to you how to use this. Experienced adventurers will probably not need to use it at all, except to score maximum points. If you are a novice you may want to read it through as you play the adventure. You will still get a great deal of satisfaction from solving the game, as it is by no means a step-by-step guide to the solution. At first though we suggest that you try to play the game without it, using it only to help you out when you become stuck.
| ARQUEBUS: | An ancient type of firearm. Given to you by the mermaid. See Hydra, Priestess. | ||
| AXE: | Used by the Bogle for chopping adventurers' heads off! | ||
| BALL: | See Crystal Ball. | ||
| BARNACLE BILL: | An old sea-salt who owns the boathouse on the islet. If you close the boathouse door after you, he won't know that you've been at his loot! | ||
| BILL: | See Barnacle Bill. | ||
| BLACK: | CRYSTAL: | Given to you by the mermaid. It is not part of the Rainbow Crystal and you should not drop it in the black crystal room. See Black Eternal Passages, Priestess. | |
| ETERNAL PASSAGES: | You are transported here by dropping the black crystal in the black crystal room. The only way out is by QUIT or LOAD. | ||
| BLUE CRYSTAL: | Given to you by the priestess. Drop this in the blue crystal room. See Gloomy Cells, Dais, Scoring. | ||
| BOATHOUSE: | On the islet. See Doors. | ||
| BODY: | See Coffin. | ||
| BOGLE: | A particularly nasty character! You cannot kill him, you must avoid him. You may meet him in three places:
|
||
| BOGLE'S: | CAVE: | In the cave complex underneath the mill. See Stone Door. | |
| CHAIR: | In the Bogle's kitchen. This operates an opening in the north wall of the cave when sat upon. Get the miller to put the sack of flour on it. See Bogle 1. | ||
| BONES: | Underneath the mill grain store. For humour only! | ||
| BOOKSHELF and BOOKS: | In Merlin's cave. For atmosphere only. | ||
| BOOT: | In the cupboard. See Water. | ||
| BOOTY AND GROG STORE: | See Boathouse. | ||
| BOTTLE: | See Milk Bottle. | ||
| BOULDER: | In the cave complex underneath the mill. Roll it underneath the hole in the roof and climb up. You will need to have drunk the milk first. See Bogle 3. | ||
| BRASS KEY: | See keys. | ||
| BRIDGE: | See Troll Bridge. | ||
| BUCKET: | In the cupboard. Use this to carry water from the pool to the dragon. | ||
| CANOE: | In the boathouse. Use this to cross the river, in both directions if necessary. The sail pole can be used to retrieve the canoe from the east bank. This saves having to carry it around the temple. See Paddle, Scoring. | ||
| CAVES: | See Bogle's Cave, Merlin's Cave, Strange Cave. | ||
| CELL: | See Dungeon, Gloomy Cells. | ||
| CENTRAL CHAMBERS: | In and underneath the temple. See Dais. | ||
| CHAIR: | See Bogle's Chair. | ||
| CHEESE SANDWICH: | At the entrance to Merlin's cave. Eat this for extra points (the sandwich, not the cave!) | ||
| CLOAK: | In the wardrobe. This makes the wearer invisible, but only for a limited time after putting it on. To repeat the effect, you must remove it and wear it again. It will disappear if dropped outside the complex, or if taken into the temple. See Troll, Hydra. | ||
| COFFIN: | Underneath the white crystal room. Open this to reveal a dead body. You can use the Rainbow Crystal to bring it back to life again at the end of the game. See Scoring. See also Vampire's Coffin. | ||
| COIN: | Left for the milkman outside the mill door. You must take this before the milkman arrives, otherwise you will not get it back. See Wishing Well, Paybox. | ||
| COLOURED ROOMS: | See Crystal Rooms. | ||
| CRYSTALS: | See individual colours. | ||
| CRYSTAL: | BALL: | Inside the mill store. If you look into it you will see images from various scenes in the game. It serves no other purpose. | |
| ROOMS: | See the entries for the crystals. | ||
| CUPBOARD: | In the temple. See Doors. | ||
| DAIS: | In the central chambers. The underground one carries the vampire's coffin. The upper one is where you must drop the seven coloured crystals to reform the Rainbow Crystal. See Strange Writing, Scoring. | ||
| DAMP ROOMS: | At each end of the evil-smelling passage. | ||
| DEAD BODY: | See Coffin. | ||
| DIRTY CAVE: | See Bogle's Cave. | ||
| DOORS: | BOATHOUSE: | Unlock this with the brass key. See Barnacle Bill. | |
| CUPBOARD: | Use the iron key to open this. See Scoring. | ||
| DUNGEON: | Underneath the temple. Unlock this with the iron key. See Scoring. | ||
| GALLERY: | This provides access to the gallery from inside the mill. It is not locked but you will need increased strength to open it. See Milk, Scoring. | ||
| MILL: | Knock and the miller will open it. | ||
| MILL STORE: | Unlock this with the small iron key. See Scoring. | ||
| MOUNTAIN: | At the base of the mountain. Break the glass window and unbolt it. See Whistle, Scoring. | ||
| STONE: | Push this to gain entry into the Bogle's cave. The miller will help you. You cannot open it from inside the cave. See Scoring. | ||
| TEMPLE: | Unlock this with the wooden key. See Scoring. | ||
| TRAP: | See Trap Door. | ||
| WARDROBE: | See Wardrobe. | ||
| DRAGON: | At the east of the evil-smelling passage. Throw water over it to kill it. See Bucket, Scoring. | ||
| DUNGEON: | Underneath the temple. You meet Merlin here, where he has been imprisoned by the vampire. See Doors, Grating. | ||
| ETERNAL PASSAGES: | See relevant colour. | ||
| EVIL-SMELLING PASSAGES: | Underneath the temple. | ||
| FALLEN ROCKS: | On the mountain ledge. You cannot move or get past these. See Secret Passage. | ||
| FANTAIL: | This rotates the mill topcap to keep the sweeps pointing into the wind. It plays no part in the game. | ||
| FLOUR: | See Sack of Flour. | ||
| FURNITURE: | Inside Bogle's cave. For atmosphere only, but see Bogle's Chair. | ||
| GALLERY: | This is a wooden balcony-like structure which surrounds the tower of the mill. There are two ways of gaining access to this. See Doors, Ladder. | ||
| DOOR: | See Doors. | ||
| GEARS: | Part of the machinery inside the mill. They play no part in the game. | ||
| GEM: | See Luminous Gem. | ||
| GLOOMY: | CELLS: | Underneath the crystal rooms. The red, green and blue crystals can be retrieved from here after using them for the first time. | |
| CORRIDORS: | Underneath the temple. | ||
| GLASS SKELETON: | See Skeleton. | ||
| GRAIN: | SACK: | See Sack of Flour. | |
| STORE: | Inside the mill. See Trap Door, Sack Hoist. | ||
| GRATING: | Outside the temple. This leads down into the dungeon cell underneath the temple. It cannot be undone from above the ground. It can only be unbolted from inside the cell. See hammer, Scoring. | ||
| GREEN CRYSTAL: | Given to you by the priestess. Drop this in the green crystal room to get back to the mountain caves. See Gloomy Cells, Dais, Scoring. | ||
| GROG SCORE: | See Boathouse. | ||
| HAMMER: | In the southern small mountain cave. You will need this to hammer the bolt underneath the grating to open it. | ||
| HOLE IN TUNNEL ROOF: | See Boulder. | ||
| HUT: | See Mill Store. | ||
| HYDRA: | He guards the road outside the temple. Use the cloak to pass him or the arquebus or sword to temporarily disable him. He cannot be permanently killed because of his ability to replace any of his missing heads with two more! Although this takes time. See Scoring. | ||
| INDIGO CRYSTAL: | In the damp room at the west end of the evil-smelling passage. See Dais. | ||
| IRON: | DOOR: | See Dungeon Door. | |
| GRATING: | See Grating. | ||
| KEY: | See keys. | ||
| ISLET: | At the base of the mountain. | ||
| JUNCTIONS: | See Roads, Tunnels, Paths. | ||
| KEYS: | BRASS: | Given to you by the priestess. This unlocks the boathouse. See Mermaid, Priestess. | |
| IRON: | In the vampire's coffin. This unlocks the cupboard and the dungeon. | ||
| SMALL IRON: | Carried by the miller at the start of the game. This unlocks the mill store. | ||
| WARDROBE: | In the Bogle's cave. | ||
| WOODEN: | Given to you by the mermaid. This unlocks the temple door. | ||
| KITCHEN: | See Bogle's Cave, Bogle's Chair. | ||
| LADDER: | Inside the mill store. Prop this up the south side of the mill to climb up the gallery. | ||
| LAMP: | At the bottom of the mill steps. Only the miller can light this, and he only has one match, so be careful with it! Give the lamp to him when he mentions it to you underneath the grain store. There is plenty of fuel in it to last the entire game. See Scoring. See also Luminous Gem. | ||
| LEATHER: | BOOT: | See Boot. | |
| BUCKET: | See Bucket. | ||
| LIQUID: | See Water. | ||
| LUMINOUS GEM: | Just outside the dungeon cell underneath the temple. This is used as a source of illumination after you lose the lamp. You will have to fumble around in the dark for a while to find it. | ||
| MAGIC: | MONOCLE: | See Monocle. | |
| WHISTLE: | See Whistle. | ||
| MANUSCRIPT: | In Merlin's cave. For atmosphere only. | ||
| MAPS: | In Merlin's cave. For atmosphere only. (Make your own!) | ||
| MERLIN: | One of the major characters in the game. Being an old hand at adventure games, he is able to offer considerable assistance during the latter part of the game, especially with information. See Dungeon, Strange Writing, Water. | ||
| MERLIN'S: | CAVE: | In the cave complex underneath the mill. See Wardrobe. | |
| CLOAK: | See Cloak. | ||
| MERMAID: | On a rock in the mountain river. One of the two mystical characters in the game. She will offer to exchange the following objects (not necessarily in this order): A wooden key for your monocle, a spade for your brass key, an arquebus for your necklace, a black crystal for your white crystal. See Scoring. | ||
| MESSAGE: | See Strange Writing. | ||
| MILK: | If you drink this you will gain increased strength. See Milk Bottle, Gallery Door, Boulder. | ||
| MILK BOTTLE: | Outside the mill door. If this is left here when the milkman calls he will exchange it for a full bottle. It will break if you blow the whistle too close to it. Later on in the game you may fill it with water from the river for drinking purposes. See Priestess. | ||
| MILKMAN: | One of the game's characters. He will knock on the mill door as the miller is operating the sack hoist. When the miller asks you to see who it is, just go to the door. There are extra points to be gained here! See Milk Bottle, Coin. | ||
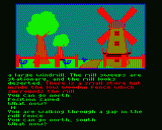
| MILL: | In the field at the start of the game. It is a traditional tower mill fitted with corn-grinding machinery. Much of the early action takes place inside here. See Fantail, Gallery, Windshaft, Doors. | ||
| FENCE: | For atmosphere only. | ||
| STONES: | For grinding the corn. They play no part in the game. | ||
| STORE: | Inside the mill enclosure. See Doors. | ||
| MILLER: | One of the major characters in the game. When you first meet him you must offer to help him with his sacks. He will then give you instructions on what to do. See Sack Hoist, Lamp, Bogle's Chair, Stone Door, Scoring. | ||
| MILLER'S LAMP: | See Lamp. | ||
| MONOCLE: | In the northern small mountain cave. Use it to see the secret passage. See Mermaid. | ||
| MOUNTAIN: | At the exit of the cave complex underneath the mill. | ||
| CAVES: | Near the top of the mountain. | ||
| DOOR: | See Doors. | ||
| RIVER: | See River. | ||
| TUNNEL: | See Roads, Tunnels, Paths. | ||
| NECKLACE: | In the white crystal room. See Mermaid. | ||
| NOTE: | See Scribbled Note. | ||
| ORANGE CRYSTAL: | In the evil-smelling passage. See Dais. | ||
| PADDLE: | Given to you by the priestess. You will need this to paddle the canoe across the river. | ||
| PASSAGES: | See Roads, Tunnels, Paths. | ||
| PATHS: | See Roads, Tunnels, Paths. | ||
| PAYBOX: | At the entrance to the troll bridge. You may drop the coin in here but it is not the correct way of getting across the bridge. | ||
| POLE: | See Sail Pole. | ||
| POOL: | See Water. | ||
| PRIESTESS: | In the secret passage. One of the two mystical characters in the game. She will offer to exchange the following objects (not necessarily in this order): A brass key for your whistle, a paddle for your brass key, a white crystal for your arquebus, a green crystal for your bottle, a blue crystal for your black crystal. See Scoring. | ||
| RAINBOW CRYSTAL: | This is reformed out of the coloured crystals. See Dais, Vampire, Coffin, Scoring. | ||
| RAISED DAIS: | See Dais. | ||
| RAVINE: | Between the mountain ledges. See Troll Bridge. | ||
| RED CRYSTAL: | On the path east of the river. Drop this in the red crystal room to get back to the mountain caves. See Gloomy Cells, Dais, Scoring. | ||
| RELICS: | Inside the boathouse. For atmosphere only. | ||
| RICKETY BRIDGE: | See Troll Bridge. | ||
| RIVER: | Runs around the base of the mountain. See Canoe, Milk Bottle, Scoring. | ||
| ROADS, TUNNELS, PATHS, ETC: | These are not individually described. See the entry for the nearest landmark. | ||
| ROCKS: | See Fallen Rocks. | ||
| ROPE: | See Sack Hoist. | ||
| SACK HOIST: | In the mill. This is used to raise and lower the heavy sacks of flour through the trap door in the mill grain store. It is operated by the miller. When it is lowered you may climb down the rope to explore underneath the grain store. | ||
| SACK OF FLOUR: | Inside the mill. This is very heavy and you will not normally be able to carry it without first dropping everything else. You may empty it, but then it is of no use! Tie it to the rope as the miller operates the sack hoist. See Scoring, Bogle's Chair. | ||
| SAIL POLE: | On the east side of the gallery. Normally used to position the mill sweeps by hand, but not used for this purpose in the game. See Canoe. | ||
| SANDWICH: | See Cheese Sandwich. | ||
| SCORING: | You score points as follows: Opening the mill store, trap door, wardrobe, mountain door, cupboard, temple door, dungeon, grating. Killing the skeleton, hydra, dragon, vampire. Reading all signs and notices. Offering to help the miller. Following him upstairs. Tying the sack to the hoist. Getting the whistle. Getting into the Bogle's cave. Eating the sandwich. Swapping any object with the mermaid or priestess. Drinking from the river. Dropping the red, green and blue crystals in their rooms. Cutting the web. You score extra points for the following: Opening the gallery door. Retrieving the canoe with the pole. Reading the strange writing. Re-integrating the Rainbow Crystal, Resurrecting the body. See also Milkman. | ||
| SCRIBBLED NOTE: | Left outside the mill door for the milkman. Read it. | ||
| SECRET PASSAGE: | At the top of the mountain, near the fallen rocks. Use the monocle to see it. | ||
| SKELETON: | He guards one of the passages in the cave complex underneath the mill. Use the whistle. | ||
| SMALL: | DAMP ROOMS: | See Damp Rooms. | |
| IRON KEY: | See Keys. | ||
| MOUNTAIN CAVES: | See Mountain Caves. | ||
| SPADE: | Given to you by the mermaid. This plays no part in the game. | ||
| SPIDER'S WEB: | See Web. | ||
| STAKE: | At the end of the gloomy corridor. See Vampire. | ||
| STATUE: | See Priestess. | ||
| STONE: | CHAIR: | See Bogle's Chair. | |
| DOOR: | See Doors. | ||
| FURNITURE: | See Furniture. | ||
| STORE HUT: | See Mill Store. | ||
| STRANGE: | CAVE: | Above the boulder passage. | |
| WRITING: | In the evil-smelling passage. Get Merlin to read it. See Scoring. | ||
| STRONG SWORD: | See Sword. | ||
| SWORD: | Underneath the black crystal room. See Web, Hydra. | ||
| TABLES: | For atmosphere only. | ||
| TEMPLE: | To the east of the mountain river. See Cloak. | ||
| TRAP DOOR: | In the mill grain store. Open this as instructed by the miller, who will then lower the sack through it. See Sack Hoist, Scoring. | ||
| TROLL: | He is normally asleep in the paybox, but will soon wake up if you try to cross the bridge without paying! Use the cloak to escape detection. | ||
| BRIDGE: | The only way of crossing the ravine. See Troll. | ||
| TUNNELS: | See Roads, Tunnels, Paths. | ||
| VAMPIRE: | In the vampire's coffin. Use the stake to kill him before he attacks you. he can be resurrected again with the Rainbow Crystal, but it is not recommended! See Scoring. | ||
| VAMPIRE'S COFFIN: | On the dais underneath the temple. Open it. See Vampire, Violet Crystal, Iron Key. | ||
| VIOLET CRYSTAL: | In the vampire's coffin. See Dais. | ||
| WARDROBE: | In Merlin's cave. Use the wardrobe key to unlock it! See Scoring. | ||
| WARDROBE KEY: | See Keys. | ||
| WATER: | At the west end of the evil-smelling passage. It only looks like water! Use the boot to get across it. If you throw the boot back to Merlin it will fall in the water. | ||
| WEB: | Underneath the temple. Carry the sword to cut it down. See Scoring. | ||
| WELL: | See Wishing Well. | ||
| WHISTLE: | In the strange cave. This emits a high-pitched note when blown and is used for breaking glass. See Wishing Well, Milk Bottle, Skeleton, Mountain Door, Priestess. | ||
| WHITE: | CRYSTAL: | Given to you by the priestess. It is not part of the Rainbow Crystal and you should not drop it in the white crystal room. See White Eternal Passages, Mermaid. | |
| ETERNAL PASSAGES: | You are transported here by dropping the white crystal in the white crystal room. The only way out is by QUIT or LOAD. | ||
| WINCH HOUSING: | At the top of the mill. Here, the miller will explain to you exactly how you can help him. Until this has happened you will not be able to help, even though you may know exactly what to do from a previous game. See Sack Hoist. | ||
| WINDMILL: | See Mill. | ||
| WINDOW: | See Mountain Door. | ||
| WINDSHAFT: | This is the large shaft inside the mill which drives the machinery. It plays no part in the game. | ||
| WISHING WELL: | In the strange cave. Throw the coin down here to get the magic whistle. See Scoring. | ||
| WOODEN: | BOATHOUSE: | See Boathouse. | |
| BRIDGE: | See Troll Bridge. | ||
| DOOR: | See Mountain Door. | ||
| KEY: | See Keys. | ||
| LADDER: | See Ladder. | ||
| STAKE: | See Stake. | ||
| WRITING: | See Strange Writing. | ||
| WRITING DESK: | In Merlin's cave. For atmosphere only. | ||
| YELLOW CRYSTAL: | In the damp room at the east end of the evil-smelling passage. See Dais. | ||
--HAPPY ADVENTURING--


