Blurb
Epic Adventures are full-scale machine code adventure games. Sophisticated compression techniques have been used to provide a large number of locations and puzzles in each game. The adventures take place in a fantasy world which you must explore in order to find the solution to each game. You will require a combination of cunning, logic and magic, not only to complete your task but even to remain alive.
Each game is played by typing ordinary English sentences into the computer, which responds by describing your surroundings and telling you what is happening. Full playing instructions are included in each game.
Each adventure has the following features:-
Approximately 230 fully described locations, ultra-fast response, fast save of partially completed game on tape, scoring, disk compatible.
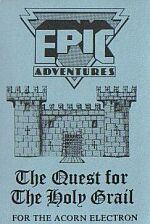
A Full-scale adventure in which you have to search the forests and wastelands around Camelot in your attempt to find the Holy Grail and return it to King Arthur.
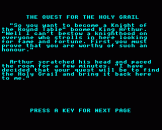
"So you want to become a Knight of the Round Table?" boomed King Arthur. "Well, I can't bestow a knighthood on everyone who strolls in here looking for fame and fortune. First you must prove that you are worthy of such an honour."
Arthur scratched his head and paced the room for a few minutes.
"I have decided that your quest will be to find the Holy Grail and bring it back here to me."
There were gasps of amazement from all the knights gathered there.
"Impossible," shouted someone.
Arthur continued, "You will face many dangers on your journey but look for the Magic Fruits of the Forest. They will be of great help to you but use their powers only when there is no other course of action open to you."
You leave Camelot feeling more than a little apprehensive. Where will you begin your seemingly impossible quest?
Playing Instructions
Commands may be entered in the form of complete sentences. It is usually only necessary to enter the first two or three letters of most words, but if this doesn't produce the expected result, retype in full.
The program has a vocabulary of approx. 140 words and it is part of the game to discover what these are. However, some words that you will need to know are listed below. Most of them have single letter input.
| NORTH, SOUTH, EAST, WEST, UP, DOWN, IN, OUT | |
| TAKE | - To pick up an object |
| DROP | - To drop an object |
| INVENTORY | - To list your possessions |
| LOOK | - To describe your surroundings |
| SCORE | - To obtain your score |
| SAVE | - To save the current game on tape |
| LOAD | - To load back a SAVEd game |
| QUIT | - To end the current game |
During the game you will need to use a torch. Use the words LIGHT TORCH to work it and OFF to extinguish it.
Helpsheet
This is an alphabetical list of all the locations, objects, characters and items referred to in QUEST FOR THE HOLY GRAIL. The location and purpose of each item is given, and the information provided in one entry will usually lead you to other items in the list. If you cannot find the word you are looking for, it probably plays no significant part in the game.
It is up to you how you use these clues. You may want to read through them as you play the adventure, or you may prefer to use them only if you get stuck. In this case, a fair amount of will-power will be required to avoid reading entries that you do not wish to see!
Due to our policy of continually improving our produces, there may be minor differences in detail between these clues and your version of the game.
Hints On Playing The Game
During your travels you will encounter various problems which can only be solved by the use of an object from a later stage of the game. When this happens, ignore the problem for the time being, and carry on until you find the object required. You should then be able to return to the problem by means of the transport mechanism provided.
| AISLE: | Inside the monastery. | |
| ALCOVE: | Inside the castle, to the east of the courtyard. | |
| ALTAR: | Inside the monastery. | |
| APPLE: | In the storeroom. See Fruit. | |
| ASHES: | In the huge cave, after killing the dragon. Not used. | |
| AXE: | In the woodcutter's shack. You must not let the woodcutter see you stealing his axe, so take it then hide it before you leave the shack. See Woodcutter. Use the axe to chop down a small tree. See Trees, Scoring. | |
| BALE OF HAY: | See Hay. | |
| BANANA: | At the foot of the vine. See Fruit. | |
| BARN: | In one of the forest clearings. Go in. See Loft. | |
| BARREN WASTELANDS: | See Wastelands. | |
| BEAUTIFUL: | GIRL: | See Girl. |
| MAIDEN: | See Maiden. | |
| BENCH: | In the barn. Not used. | |
| BLACK KNIGHT: | To the east of the crossroads. See Knights. | |
| BLACKBERRY: | In the small room at the east end of the hallway. See Fruit. | |
| BLANK WALL: | At the end of the dark tunnel. See Tunnels. | |
| BLUE KNIGHT: | To the north of the forest. See Knights. | |
| BRIDGE: | Across the valley. You can only cross this from south to north. | |
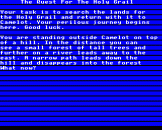
| CAMELOT: | On the top of the hill, at the start of the adventure. You must return here with the Grail, to finish the game. | |
| CANDELABRA: | In the small room in the monastery. You must light the candles with your burning torch. See Monk. | |
| CANDLES: | See Candelabra. | |
| CASK: | On the pass. See Vat of Oil. | |
| CASTLE: | To the east of the swamp, past the lawn. This is surrounded by the moat. See Drawbridge. | |
| CATTLE: | On the hill. For atmosphere only. | |
| CAVES: | HUGE: | To the north of the pass. See Ladder. |
| SMALL: | Above the huge cave. | |
| CELLS: | In the dungeons. There are six of these, three to the north and three to the south of the corridor. You must pull the ring in the south, central cell to find the secret tunnel. | |
| CHURCH: | See Monastery. | |
| CLEARING: | There are two, both in the forest. | |
| CORRIDOR: | In the dungeons. See Cells. | |
| COURTYARD: | Just inside the castle adventure. | |
| CROOK: | To the north of the castle. You will need this to reach the lever. | |
| CROSSROADS: | To the east of the forest. | |
| DARK ALCOVE: | See Alcove. | |
| DEADMAN'S END: | To the south of the swamp. | |
| DIAMOND NECKLACE: | See Necklace. | |
| DINGY STOREROOM: | See Storeroom. | |
| DOORS: | COURTYARD: | Surrounding the courtyard. |
| GREEN: | At the top of the spiral staircase. Go in. See Small Rooms. | |
| MONASTERY: | See Hallway. | |
| OUTSIDE TOWER: | See Tower. | |
| RED: | At the top of the spiral staircase. Avoid it. | |
| YELLOW: | At the top of the spiral staircase. Go in. See Small Rooms. | |
| DRAGON: | In the huge cave. Throw the cask of oil at it. | |
| DRAWBRIDGE: | This is used to bridge the moat. See Lever. | |
| DUNGEONS: | Underneath the castle. Down the steps to the south of the courtyard. See Cells. | |
| EBONY SWORD: | On the Island. Not used. Note, it does not kill the black knight. See Knights. | |
| EMERALD SWORD: | In the long grass next to the lawn. See Swords. | |
| FALLEN: | ROCKS: | At the end of the pass. You cannot get past these. |
| TREE: | At the end of the sloping passage from the small cave. See Lance. | |
| FLINT: | Near Deadman's End. Use it to light the torch. | |
| FOREST: | To the east of Camelot. | |
| FRUIT: | There are four of these. Most of them provide a transport mechanism when eaten, as follows:- | |
| APPLE: | Returns you to the castle entrance. | |
| BANANA: | No effect. | |
| BLACKBERRY: | Returns you to the crossroads. | |
| RASPBERRY: | Returns you to the north side of the bridge. | |
| FURNITURE: | In the shack. For atmosphere only. | |
| GIANT OAK TREE: | See Oak Tree. | |
| GIRL: | On the island. Give her the necklace and she will offer you the Grail, and one sword. Take the sapphire one. | |
| GLOWING OPAL: | See Opal. | |
| GOLD: | SWORD: | In the barren wastelands. See Swords. |
| THRONE: | See Throne. | |
| GRAIL: | See Girl, Scoring. | |
| GRASS, LONG AND SHORT: | Next to the lawn. | |
| GREEN: | DOOR: | See Doors. |
| KNIGHT: | At the castle entrance. See Knights. | |
| HAIRY PAW: | Underneath some of the iron rings. You've lifted the wrong ring! See Rings. | |
| HALLWAY: | At the north end of the monastery. There is a door at each end. The door at the west end is the main exit from the monastery. Go out. You will need the large key to open the door at the east end. | |
| HAMMER: | In the barn. Not used. | |
| HAY: | In the loft. Use this to feed the horse. See Scoring. | |
| HEDGES: | In the forest. For atmosphere only. | |
| HILL: | See Camelot. | |
| HOLE IN ROOF: | In the huge cave. See Caves. | |
| HOLY GRAIL: | See Girl. | |
| HORSE: | Near the barren wastelands. See Hay. | |
| HUGE: | CAVE: | See Caves. |
| STONE: | At the east end of the valley. See Opal. | |
| IRON RINGS: | See Rings. | |
| ISLAND: | In the lake. See Raft. Tie the raft to the saplings before leaving it. See Rope. | |
| JETTY: | To the north of the lake. | |
| KEYS: | LARGE: | At the top of the spiral staircase. See Hallway, Scoring. |
| SMALL: | On the path to the north of the undergrowth. See Witch, Scoring. | |
| KNIFE: | In the small room at the top of the castle. See Rope, Scoring. | |
| KNIGHTS: | There are five of these, each of a different colour. You will need to find the appropriate sword to deal with each knight, as follows:Blue knight - sapphire sword; Red knight - ruby sword; Green knight - emerald sword; Yellow knight - gold sword; Black knight - you cannot kill the black knight with any sword. | |
| LADDER: | In the barn. After using it to climb up to the loft, carry it with you. Use it to reach the hole in the roof of the huge cave. (You will have to drop it again before you can climb it!) See Scoring. | |
| LAKE: | To the east of the path through the undergrowth. See Raft. Sail east to get to the island, and north to the jetty. | |
| LANCE: | In the alcove. Use this to move the fallen tree. | |
| LARGE: | KEY: | See Keys. |
| OPAL: | See Opal. | |
| LAWN: | To the east of the swamp, in front of the castle. | |
| LEAFY PLATFORM: | Up the oak tree. Go east towards the trunk of the tree and climb down the vine. You cannot climb back up here. | |
| LEVER: | At the front of the castle, pull this to lower the drawbridge. You cannot stretch across the moat to reach it. See Moat. | |
| LOFT: | Climb the ladder in the barn. | |
| LOGS: | Made by sawing up the tree. See Trees. | |
| LONG: | GRASS: | See Grass. |
| ROPE: | See Rope. | |
| MAIDEN: | Behind the green door. You are advised not to listen to her! | |
| MOAT: | Surrounding the castle. If you walk around the castle to the east side, you can then get down the bank of the moat and wade through it. You will need to do this in order to be able to reach the lever, but see Crook. | |
| MONK: | He appears when you light the candles. See Opal. | |
| NECKLACE: | Given to you by the witch when you release her. Give it to the girl. | |
| NICHE: | See Huge Stone. | |
| OAK TREE: | In the forest to the south of the crossroads. Climb this until you reach the point where the branches spilt, then take the west one until you fall onto the leafy platform. In early versions of the game, a wrong move was fatal. See Trees, Leafy Platform. | |
| OIL: | See Vat of Oil. | |
| OLD BARN: | See Barn. | |
| OPAL: | Given to you by the monk. Place it in the niche in the huge stone at the end of the valley. | |
| PASS: | At the east end of the valley, beyond the huge stone. | |
| PASSAGE: | See Sloping Passage. | |
| PAW: | See Hairy Paw. | |
| PILE OF: | ASHES: | See Ashes. |
| LOGS: | See Logs. | |
| PLANK: | In the barn. See Stepping Stones, Scoring. | |
| PLATFORM: | See Leafy Platform. | |
| RAFT: | You have to make this yourself. See Trees and Rope. Use it to sail across the lake to the island. (Drop it then type the direction you wish to go.) | |
| RASPBERRY: | In the narrow passages next to the small cave. See Fruit. | |
| RED: | DOOR: | See Doors. |
| KNIGHT: | Above the valley. See Knights. | |
| RESURRECTION: | If you get killed, you can choose to be resurrected up to a maximum of three times. You will lose points for this which you cannot regain, so you are advised to load back a saved position whenever possible, instead of opting for resurrection. | |
| RINGS: | In the dungeons. See Cells. | |
| RIVER: | At the northeast edge of the forest. Use the raft to cross it on the return journey. (Type Wait when the program suggests that you wait.) | |
| ROCKS: | At the end of the pass. See Fallen Rocks. | |
| ROOM: | See Small Room. | |
| ROPE: | At Deadman's End. You can cut this in half with the knife. One half is used to tie the logs together to make the raft. See Trees. The other piece is used to tie the raft up to the island. | |
| RUBY SWORD: | In the forest. See Swords. | |
| SAPLINGS: | On the island. Tie the raft to these. See Island. | |
| SAPPHIRE SWORD: | On the island. See Swords. | |
| SAW: | In the barn. See Trees. | |
| SCORING: | Apart from scoring points by solving the various puzzles etc, you also score points for picking up the following objects: Grail, axe, plank, ladder, knife, all the swords and keys. Note that you do not need all of these objects in order to complete the game. | |
| SHACK: | In one of the forest clearings. Go in. See Woodcutter. | |
| SHEPHERD'S CROOK: | See Crook. | |
| SHORT: | GRASS: | See Grass. |
| ROPE: | See Rope. | |
| SILVER SWORD: | On the island. Not used. | |
| SLOPING PASSAGE: | Next to the small cave. You will have to crawl along part of this. | |
| SMALL: | CAVE: | See Caves. |
| KEY: | See Keys. | |
| ROOM: | 1) At the top of the castle, overlooking the monastery. 2) Behind the door at the east end of the hallway in the monastery. 3) At the top of the spiral staircase. These contain the witch and the maiden. |
|
| SPIRAL STAIRCASE: | Inside the tower. | |
| ST. BENEDICT'S: | See Monastery. | |
| STAIRCASE: | There are a number of these inside the castle. See also Spiral Staircase. | |
| STEPPING STONES: | These form a path through the swamp. The most southerly one is just out of reach, and you must drop the plank here to bridge the gap. | |
| STEPS: | On the north side of the valley. See also Staircase. | |
| STONE: | HUGE: | See Huge Stone. |
| TOWER: | See Tower. | |
| STOREROOM: | To the north of the courtyard. | |
| SWAMP: | To the south of the forest, beyond the large oak tree. See Stepping Stones. | |
| SWORDS: | These are used for dealing with the knights. You can only carry one at once. See Knights, Scoring. | |
| TABLE: | In the small room in the monastery. You cannot do anything with this. | |
| THRONE: | On the island. For atmosphere only. | |
| TOOLS: | In the Barn. See the entries for the individual tools. | |
| TORCH: | In the oak tree. You can see in the dark by lighting it with the flint. You will also need it to light the candelabra. | |
| TOWER: | At the west end of the valley. Go in the door at the bottom. | |
| TRANSPORT MERCHANT: | See Fruit. | |
| TREES: | In the forest. Most of these are for atmosphere only. If you have the axe, you can chop down one of the small trees to the east of the crossroads, then saw it up into logs with the saw. See Raft. There is one large oak tree in the middle of the path to the south of the crossroads. See also Oak Tree and Fallen Tree. | |
| TUNNELS: | Underneath the dungeons. These emerge behind the monastery wall. Push the wall and go north to enter the monastery. After you do this, the wall will close again. | |
| UGLY WITCH: | See Witch. | |
| UNDERGROWTH: | To the north of the fallen tree. | |
| VALLEY: | To the east of the barren wastelands. This is spanned by the bridge. | |
| VAT OF OIL: | In the barn. You cannot do anything with the vat itself but when you have the cask of wine, empty it and fill it with oil. See Dragon. | |
| VINE: | Up the oak tree. Climb down this. See Leafy Platform. | |
| WALL: | At the end of the dark tunnel. See Tunnels. | |
| WASTELANDS: | To the north of the monastery. | |
| WILD HORSE: | See Horse. | |
| WINE: | Do not drink it. | |
| WITCH: | Behind the yellow door. Release her with the small key. See Necklace. | |
| WOODCUTTER: | He will appear when you leave the shack. Do not let him see you leaving with his axe. | |
| WOODEN: | BENCH: | See Bench. |
| SHACK: | See Shack. | |
| WOODWORKING TOOLS: | In the barn. See the entries for individual tools. | |
| YELLOW: | DOOR: | See Doors. |
| KNIGHT: | On the path to the north of the undergrowth. See Knights. | |
--HAPPY ADVENTURING--
