Introduction
Crack It! Towers, A game for puzzle fans of any age!
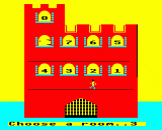
Home of the team that brings you Crack It! puzzle magazine, Crack It! Towers conceals a magic secret within its walls. Each of the rooms in Crack It! Towers contains a puzzle which you must solve to have any hope of completing your quest. There are arithmetic problems, spelling games, anagrams and more. You'll meet some rather odd characters who may or may not be friendly - some of them will try to attack you or steal your precious keys as well.
If you fail a particular challenge, you'll find yourself in the moat. But you can also gain bonus keys in mysterious Maze of Skulls - if you play your cards right!
Crack It! Towers has three levels of difficulty - but if you start doing too well, the challenges will get harder. The word problems can be infinitely varied with different sets of words so that parents and teachers can change them to keep the challenge going.
If you like puzzles, you'll love Crack It! Towers!
Visitors' Guide Book
A Message From The Owner
It appears that you are under the misguided impression that you can crack the secret of Crack It! Towers. Well, I think we should get one or two things straight before we start.
Crack It's the name, and evil's my game - so beware the curse of Count Crack It! You wouldn't want to cross me, now, would you?...
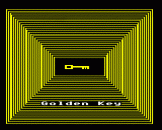
If you really think you can claim all seven golden keys and steal the secret of my powres from the innermost reaches of the Towers, you had better read this guidebook thoroughly...or you won't have a bat's chance in hell...! I can take on all sorts of different disguises, and my pets will be out to get you too. You'd better be able to swim, too, as if you fail a single challenge, you'll be in the moat before you can say SPLASH! You need seven golden keys to even attempt entry into the last secret room. My pets will grab every opportunity to steal them from you, but you can win bonus keys in the Maze of Skulls.
You'll find all the practical help for taking up the challenge on your computer on the back of the inlay card. What follows here is the theory - you just have to trust that I'm not misleading you...
Important Note: Before you can enter any of the rooms, you have to pass my manic mental arithmetic tests - thinking caps on now!
Room 1
This is the home of the first of my pets - Oswald the Rubber-Necked Duck. You must guess what he wants for his dinner today, and if you get it right, Oswald will gobble up the word (instead of you, heh, heh, heh).
Try different letters, one at a time, until you can complete the word. Each time you press a letter that is in the word, it will appear in its correct place. Letters that are not in the word appear in its correct place. Letters that are not in the word appear in a 'reject' line at the bottom of the screen. You have nine tries to get it right, and if you use a letter twice, you automatically fail.
Hint: Try the commonest letters of the alphabet first - you should be able to make an educated guess once you've got some of the letters right.
Room 2
My second pets are not very pretty to look at - but neither am I, so we get along fine! However, they are rather stupid, as they keep asking you to shoot them - but watch out, because they've trapped you in their ranks, too.
The maximum number of shots you can have each time is given at the top of the screen. Choose a number to shoot and type it in. They start disappearing from the right-hand end. Now it's my turn to get rid of a few of the ugly little blighters. You are at the left-hand end, and if you manage to avoid shooting yourself, you'll win a golden key.
Hint: Work out a plan of action quickly before you start playing and you should manage to survive.
Room 3
This is where I keep my nocturnal friends, the black bats. They won't like you and your laser gun one bit, and will use their radar-guided sonar bombs to get you out of their hideaway as quickly as they can. To survive, you must fire on them and keep yourself out of their firing line.
You can avoid the bombs by pressing Z and X to move your laser left and right - but if it's hit, you'll fail the challenge. At the bottom of the screen, you'll see a take-away sum, and at the top different numbers will appear in quick succession. Press SPACE when you spot the right answer - if you're right, your automatic gun will knock one out. Then a different sum appears. You must knock out five bats before you get to win your key.
Hint: If you miss the right answer, it will come round again, but you'll have lost valuable time.
Room 4
This is my swimming pool, where young Jim the Jellyfish has his daily work out. Unfortunately for him, I also let my sharks exercise here - at the same time. (I have to keep him on his multitudinous toes somehow!)
Start by typing in the number of the lane Jim is to swim down. He'll move there and start swimming down from the top automatically, and you'll get your key when he reaches the finish line. But beware! A warning will sound when a shark is near, and he'll poke his nose out right in Jim's way, and a sequence of numbers will appear at the bottom of the screen. Work out the next number in the sequence, type it in and press RETURN. If you get it right, Jim will swallow the shark whole. But if the shark wins, you'll find yourself in the moat.
Hint: One of the lanes is completely free of sharks - but I'm certainly not going to tell you which one. It changes every time you play anyway.
Room 5
This room's not for the squeamish - it's my spiders' playroom. Today they're all dangling off the ceiling, ready to drop on you at any minute. But if you're clever, you can make them drop on your stick of dynamite instead.
At the centre left of the screen is a multiplication sum. Work out the answer, type it in and press RETURN and one of the spiders will start sliding down towards you. By pressing the Z and X keys to move the dynamite left and right, manoeuvre it to the point where the spider will land, so he will self-destruct on impact. Then a new sum will appear. You need to hit three spiders before you can claim your key.
Hint: There's no cheating allowed either - you can't hit two spiders at the same time.
Room 6
This is where my extraterrestrial playmate, Albert the Alien, lives. For reasons best known to himself, he feels most at home in a minefield. If you can guide him right across the minefield, he'll let you take the golden key.
At the top of the screen, you'll see the word "Direction". Choose which direction you want Albert to move - N(orth), S(outh), E(ast) or W(est), and type it in. Then STEPS will appear. Choose how far he should move and type in a number between 1 and 9. Albert will then move, following your instructions (Someone should tell him who's boss around here - he seems to follow anyone around!). Landing on a mine means instant death for both of you.
Hint: Try to plan one move ahead as you go - you only have a limited time to complete the journey.
Room 7
Things are getting pretty spooky up here - this is the Haunted Tower and only my spectral friends from 'the other side' (ghosts to you) can stand the creepy atmosphere.
Once the tower has materialised, you'll see a row of letters jumbling around at the bottom of the screen. Work out what the word is and type in the first letter as quickly as you can. If you're right, you must then type the rest of the word in correctly. Press RETURN and hey presto! you win another golden key. But like everything else at Crack It! Towers, nothing's quite as simple as it looks. As soon as the letters start jumbling, my ghosts will start drifting across the screen, one at a time, to bite large chunks out of the tower. If all five make it to the other side before you've solved the problem, the tower will collapse, and you'll be in the moat again!
Hint: Plan your strategy carefully, as you can't press a key while there's a ghost on the move.
Room 8
Come on! You didn't really think I was going to give you any clues at this stage, did you?
Bonus Keys
Each time you successfully complete a challenge and gain a key, I'm generous enough to offer you the chance of winning a bonus key in the Maze of Skulls.
You can explore the maze in the helicopter I've provided, using Z and X to go left and right, and P and L to go up and down through the gaps between the fences. Seventeen identical white skulls will appear in the maze at random. Fourteen are quite harmless - you can fly right up to them (you must be going forwards), press SPACE, and they'll disappear. Two of the skulls are deadly - if you get too close to them, they'll turn green and blow you up. But there is one skull which hides a golden key - if you're lucky enough to find it, the skull will transform itself.
Hint: Although this is a game of chance, I will give you one clue. There's a number at the top of the screen which is something to do with screen co-ordinates - but you'll have to work out what!
Other Problems In Store...
Whenever you fail to complete one of my little tasks, you'll get a ducking in the moat. However, as you will have realised by now, there will be more than cute little ducklings swimming around in there.
My pernicious piranha fish have a taste for golden keys as well as human flesh. You'll survive if you have no keys, but if you do have any, watch out! The minute you hit the water, all three of them will start heading towards you, and a question will appear at the top of the screen. You must answer it before they get to you, or I won't be responsible for the consequences!
As soon as you have at least one key, you're vulnerable. He will appear from nowhere and eat your key...unless you hit SPACE first. He'll go away then - for now.
Once you have at least three keys, watch out for this one in the castle doorway. You must hit SPACE before he can whizz out and swallow up one of your keys.
When you've amassed four keys, he'll pop up on the left-hand side of the screen and scuttle towards your hard-won hoard. Press SPACE as soon as he appears to block his path.
Just when you've chosen the next room to challenge, he'll glide out through a window and hover longingly around your key score. A three-letter word will appear at the top of the screen - but with one letter missing. You have just ten seconds to select the right letter to complete the word. Beware - there's usually more than one option, but only one right answer!
The first white ghost can jump out on you whenever he feels like it - but he's not interested in your keys. His purpose in life is to transport you to my dungeons and keep you there till you answer his question correctly - or his spiders will get you!
His sibling, the second white ghost, can only catch you when you've amassed six keys (and you thought you were nearly there, didn't you?). You must guess his age, or he'll steal a key. Be careful, you only have a certain number of tries at this.
Because Crack It! Towers is in the middle of nowhere, we sometimes get power failures - just when they're least expected. You'll hear a big bang when the generator blows, and everything will go black. To restore the power, watch out for the word that will appear on the screen - you must concentrate as it's only there for a few seconds. Then type it in correctly, and bingo! the lights will come on again. If you're wrong, one of my friends will creep up under cover of darkness and steal one of your keys - but you won't be able to stop him!
Well, that's all the help you're going to get from me - I think I've told you far too much anyway, but the people who wrote the program said I had to be reasonable, otherwise you wouldn't even bother to breach the walls of my fortress.
I'd say 'Good Luck' if I were a nice person, but as you know, that's one thing I'm not!
Signed Count Crack It!
Crack It! Towers, November 1985


